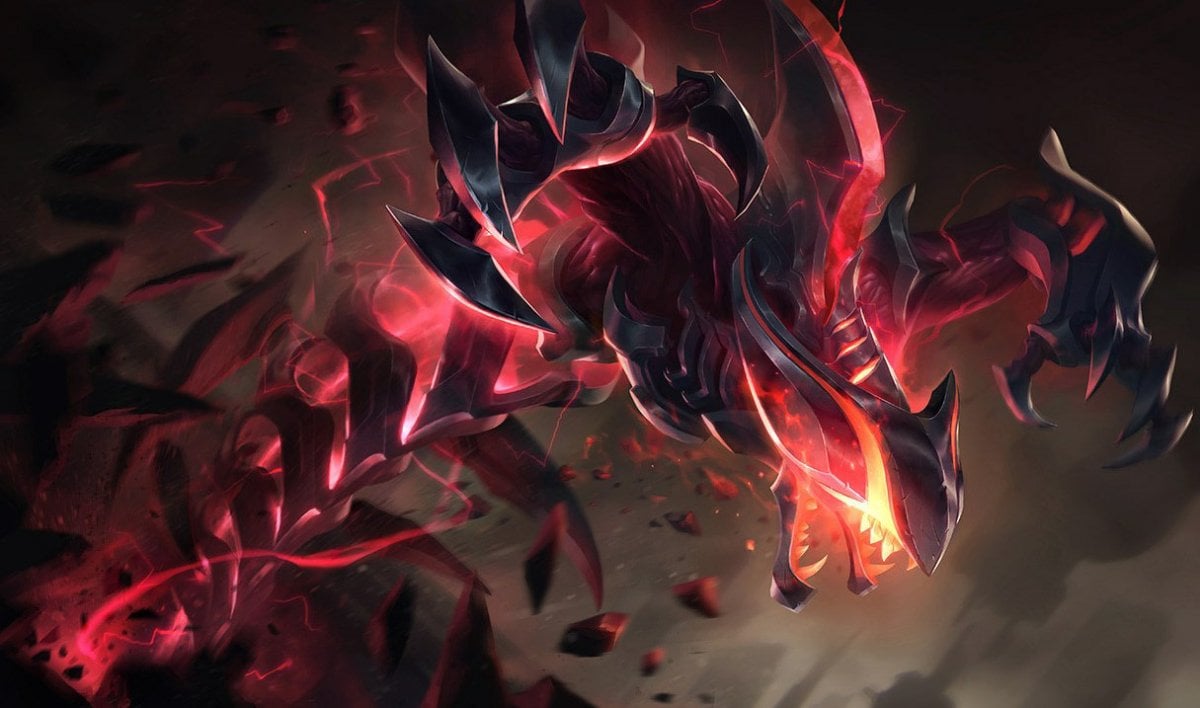
After being off the radars for an entire season, Riot Games decided to give Rek’Sai some love and needed buffs with the release of Patch 13.11 on June 1. They gave her increased sustain from her W, as well as buffs on her damage abilities, making her one of the strongest junglers in the meta.
Aside from her main role, however, Rek’Sai has seemingly found increasing success as a top laner, boasting impressive numbers and a 53 percent win rate, according to stats site lolalytics. And the buffs that were supposed to push her into the jungle, have ended up rewarding her in the top lane a lot more.
Even though she’s still not as popular currently, Rek’Sai can be a great pick to surprise enemies, especially as a counter. Therefore, we will be going over her builds and runes, as well as some essential information to quickly pick her up and get the most out of her kit. Here is how you play top lane Rek’Sai in League.
Rek’Sai in the top lane: Runes and Build
Rek’Sai top lane rune setup is similar to the one used in the jungle. She still goes for Conqueror as her main keystone rune since she can take full advantage of the extra adaptive force during her combos and trades throughout the game. It can give her the edge both in teamfights and especially in one-vs-one situations, which is going to be common when playing Rek’Sai top.
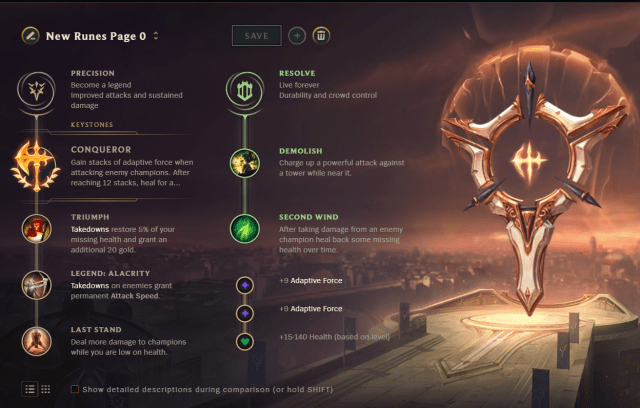
The minor runes from the Precision tree are Triumph, Legend: Alacrity, and Last Stand. The first two are standard and are the only viable runes for Rek’Sai from that tree. Last Stand, on the other hand, is stronger than Coup de Grace in most scenarios since she will be fighting aggressively against the opponents, and the bonus damage will be beneficial when finishing off the enemies.
That said, the secondary tree is where the big difference lies. Top lane Rek’Sai wants to go for Demolish and Second Wind from the Resolve tree. The former is to further boost her split push potential, while Second Wind synergizes with the champion’s innate healing to increase her sustain in the early stages and every time she finishes fighting with her enemies.
When it comes to the build, Rek’Sai has a standard set of items she wants to purchase, but there is a high degree of customization, depending on which role she needs to fit within the team comp or how the game state is. Regardless, her Mythic item is always going to be Stridebreaker, given the stats it offers, as well as the active effect that slows nearby enemies. It makes it almost impossible for the enemies to get away from her combo, and it can also be used for wave clearing if necessary.
After that, most players go for Black Cleaver to get extra health, attack damage, ability haste, as well as the ability to shred enemies’ armor. By doing so, Rek’Sai can deal more damage the longer the trade is extended. While the first core items are pretty much the same across the board, it’s from the third item onwards that you start customizing the build.
If you’re going to be split pushing a lot and fighting one-vs-one, Hullbreaker is the most efficient third item to get. Get Sterak’s Gage and a Death Dance to round off the build. With these items, you will have enough damage and resistances to duel against most champions and exert side lane pressure thanks to the Hullbreaker’s passive.
If you’re inclined towards joining the fights and looking for picks on your team, don’t go with Hullbreaker and instead build resistances immediately with Death Dance, Maw of Malmortius, and Guardian Angel. Spirit Visage can be a great alternative if you have other champions that heal and shield while Serylda’s Grudge is strong when fighting multiple tanky champions. Antiheal might be needed in certain matchups, so Chempunk Chainsword is a good situational item to take into consideration.
Rek’Sai’s ability order
The maxing order is the same here as for its jungle version: R>Q>E>W. That being said, you always want to start with W in the top lane for a couple of reasons. First, it allows Rek’Sai to potentially track enemies’ movements, and most importantly, which side the enemy jungler is starting on. Additionally, you can use it to knock up the enemy to deal damage and get one or two free auto attacks, winning the level-one trades. If that wasn’t enough, you can get free sustain by charging the fury and using W to heal up. After that, get Q at level two and E at level three, then max in the traditional order.
Laning phase with Rek’Sai top
The laning phase is probably the most important moment for Rek’Sai since it’s when she’s at her strongest. The void champion will prevail in most melee matchups as long as she’s able to cast her full W-Q-E combo onto the enemy. And even if the trades don’t go as intended, Rek’Sai can always use the minions and her W to heal back up more than the enemy, allowing her to always get the upper hand.
Trade aggressively and force the enemy to fight you: walk up whenever he tries to last hit minions and land the combos. As soon as he drops low, finish him off with Ignite or by using the ultimate. Make sure to shove waves and proc Demolish to get gold from the turret plates to further extend your lead.
It’s important to get a lead since Rek’Sai falls off later in the game compared to other champions. If the enemy is not engaging in trades with you, shove waves and use the tunnels to gank the other lanes or invade the jungler when he’s farming camps. Regardless, you should have enough damage to kill one enemy.
Mid and late-game execution
Once you get into the mid-game, you should have substantial gold and experience lead over the enemy. Thanks to the Demolish rune, as well as Rek’Sai’s empowered auto attacks, she can quickly take down turrets. Stay on the side lane as long as you win against whoever matches you, and let your teammates play around objectives on the other side of the map.
If you’re the only fed member, however, try to join fights and focus down the enemy’s carry. Try to get into a flank position and dash in with the tunnels to knock up and take down the target.