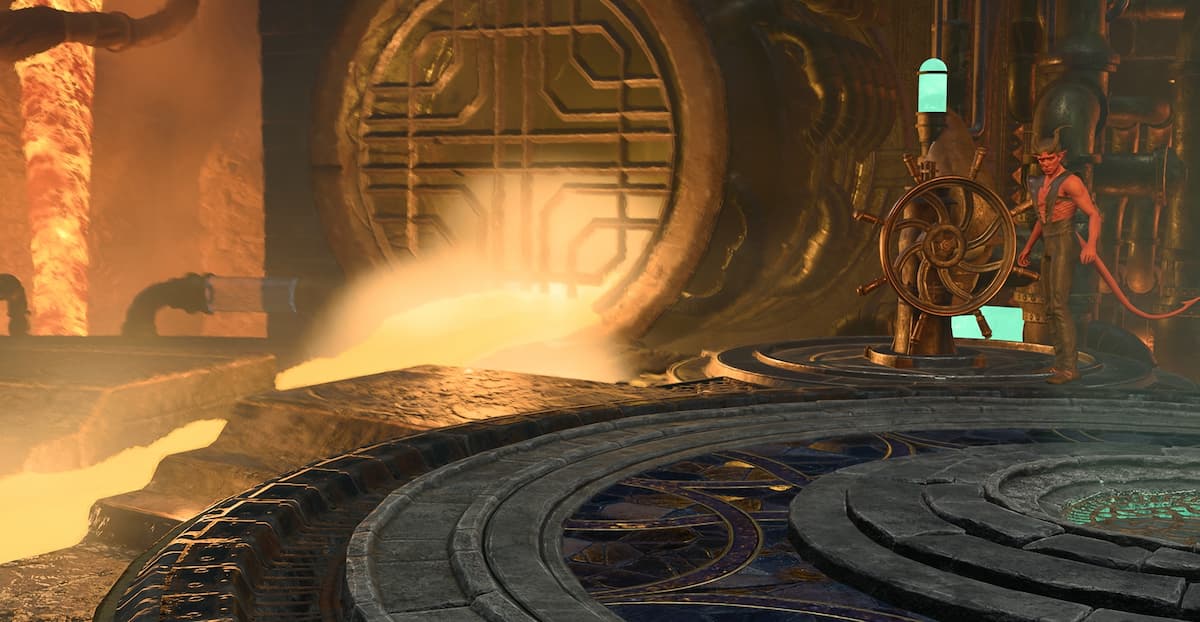
The Adamantine Forge is one of the most intriguing locations in all of Baldur’s Gate 3. This ancient forge is used to create powerful and unique weapons and armor.
This location is a ways off the beaten path, though, making it difficult to find. It’s just as difficult to use, too, given that you’ll need to follow a series of specific steps before you can even turn the forge on. In this guide, we’ll show you exactly how you can reach and activate the Adamantine Forge in BG3.
How to reach the Underdark in BG3
To reach the Adamantine Forge, you have to venture through the Underdark, the under-the-surface world in BG3. This area is an optional path; you can either choose to go through the Underdark or the Mountain Pass to get to Act Two. There are four different ways of reaching the Underdark:
- Going through a pit in the Whispering Depths dungeon.
- Solving a puzzle in the Defiled Temple at the goblin camp.
- Venturing through the Zhentarim Hideout.
- Diving into a pit underneath Auntie Ethel’s teahouse.
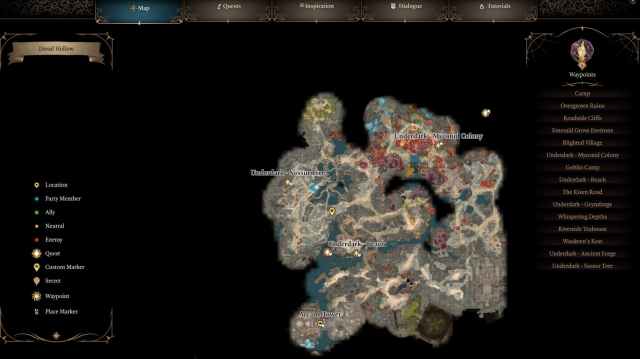
How you reach the Underdark is entirely up to you, but if you’re looking to make it to the Adamantine Forge, you need to travel to a specific waypoint called “Underdark – Beach.” This waypoint is smack-dab in the middle of the Underdark area, and you can find it southwest of the Myconid Colony and north of the Arcane Tower, as shown on the map above.
Getting to Grymforge
Once you reach the beach waypoint, you need to interact with the boat located at the dock. This boat will transport you to the Grymforge, a mine full of dwarves that have enslaved several gnomes. You’ll next want to follow the steps below to get to the Adamantine Forge:
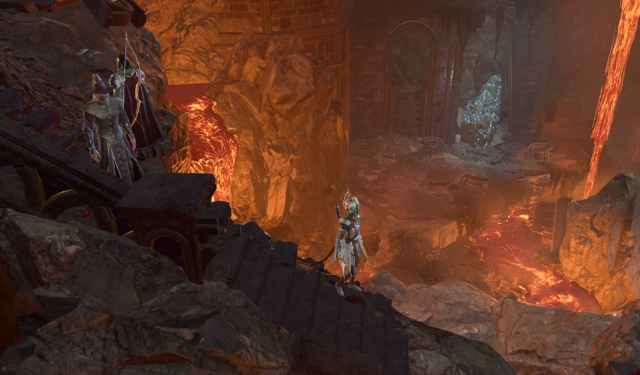
- Head south of the Grymforge waypoint until you approach an area with lava around it. There should be gnomes trying to save a man named Nere from a collapsed cave.
- To the left of the cave-in, you’ll find a small patch of rock near a fallen statue of Shar where you can jump, teleport, or fly to reach an upper level of a rock platform.
- Refer to the image below to see exactly where you need to jump.
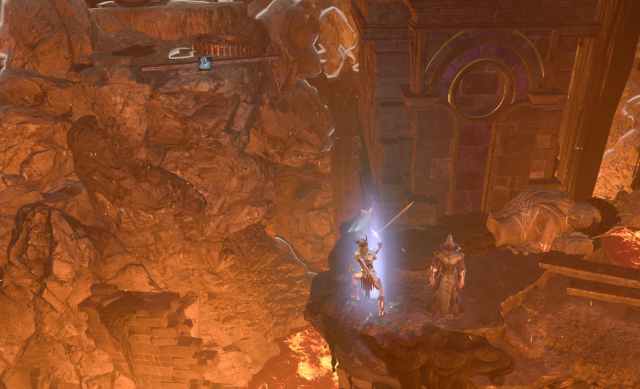
Only one of your characters needs to get up to that spot; after you’ve ventured forward, you’ll eventually reach the “Underdark – Ancient Forge” waypoint.
Once you discover this waypoint, the rest of your party can fast-travel to it. At this waypoint, you’ll find enemies along with different kinds of moulds lying around. Grab as many of them as you can find because they’re paramount to working the forge. There is a Mace, Splint, and Scale armor mould in the direct vicinity around the waypoint.
Finding Mithral ore at the Adamantine Forge
To find the Mithral ore, the second piece you need to activate the forge, follow the steps below:
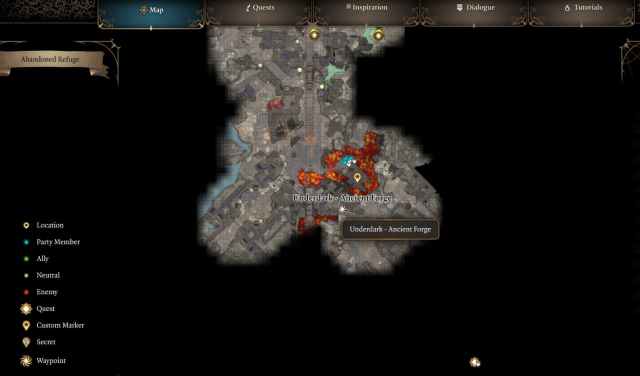
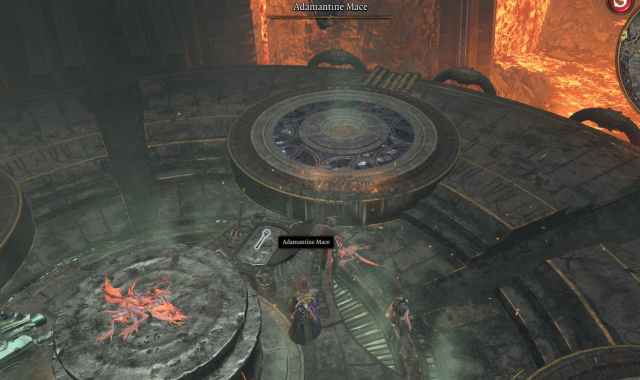
- From the Adamantine Forge waypoint, head southeast to reach a set of descending steps, after which you’ll find the Adamantine Forge at the bottom.
- Before heading to the forge platform, go to the left on the rocks until you see a blue rock, as shown in the image below.
- Enemies will ambush you at this location, so be prepared. Defeat them and then blow up the blue rock.
- If done properly, you should receive the Mithral ore and you can now proceed to the forge with both mould and ore.
How to activate the Adamantine Forge in BG3
Before you activate the Adamantine Forge, you’ll want to make sure you’re prepared for a fight. Return to camp, recruit your strongest allies, and equip any of your favorite weapons and armor so you can improve your chances of beating the forge’s defender.
Spawning the Grym
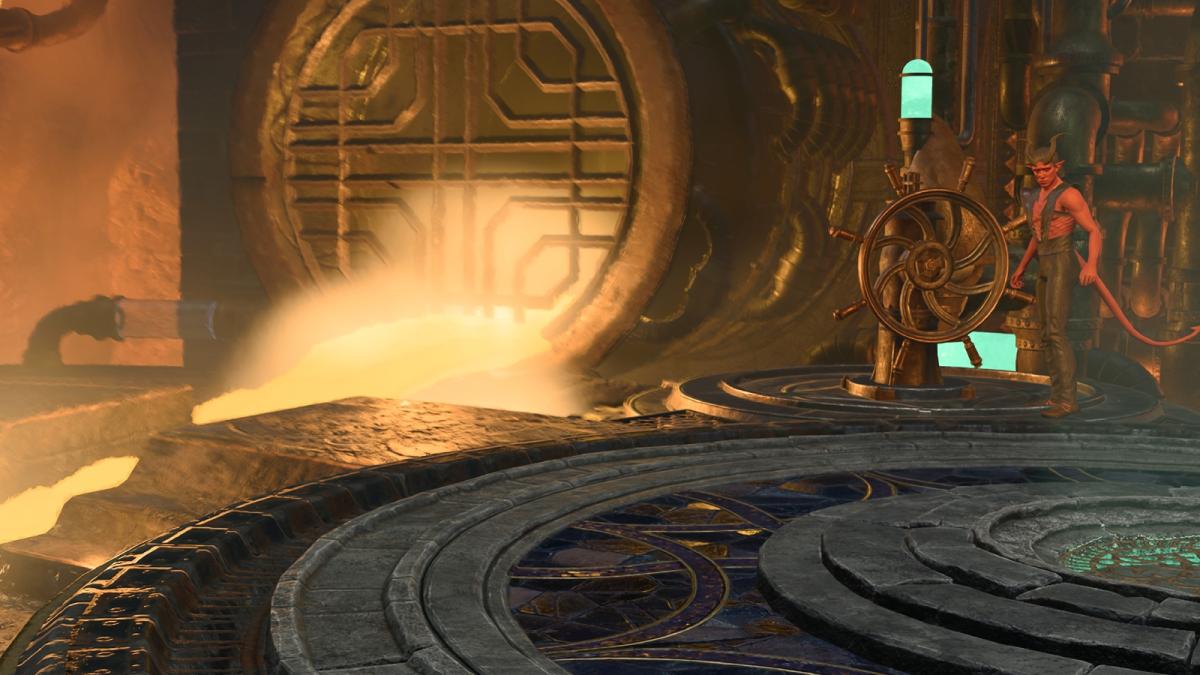
At the forge, you’ll see a crucible, a mould-ejection lever, and a mould chamber. Follow the steps below to begin activating the forge.
- Click on the crucible and insert your Mithral ore.
- Click the mould chamber and insert one of the moulds inside the box.
- Interact with the lever on the back of the platform.
- Press it to bring a hammer down on the crucible, causing the forge to descend to the lava below.
- Find the lava lever on the opposite side of the forge platform.
- Pull the lever to release the lava into the platform.
This will spawn the Grym enemy, a giant construct with over 200 health. If you examine the Grym, you’ll see it has no weaknesses. To beat this enormous enemy, ensure it’s in the lava so it becomes Superheated. Then, get one of your characters on the mould chamber and another one of your characters near the forge lever that descended the platform.

How to defeat the Grym in BG3
With this setup in place, there’s a few steps you’ll want to take to beat the Grym:
- Have your character stand in the mould chamber and attack the Grym. This will force the Grym to focus that character.
- Get the Grym to stand on the circular crucibile platform, which will happen if it’s targeting your character on the mould chamber.
- Drop the forge hammer on the Grym by pulling the lever on the back of the platform, making sure there’s still lava around.
- Tip: The hammer won’t do damage when the lava is drained.
If all goes right, the Grym will take massive damage and fall down. You need to repeat this process to kill it. Once that happens, you can take your weapon or armor from the mould chamber. This will be of Adamantine variety, which allows the wearer or wielder to avoid all critical hits.
All Adamantine Forge weapons and armors in BG3
Players can get several weapons and items from the forge, depending on the mould they used in the process. Here are all the items you can get from the Adamantine Forge in BG3:
- Adamantine Splint Armour
- Adamantine Scale Mail
- Adamantine Mace
- Adamantine Shield
- Adamantine Scimitar
- Adamantine Longsword
The forge is reusable as long as you have another mould and more Mithral ore. You can find another bit of ore right near the forge waypoint. Unfortunately for players, the full Adamantine armor set doesn’t include a helmet, but the rest is stunning and a great medium armor for your playthrough.
Others Asked
What must players do before they can reach the city of Baldur's Gate in the game?
Players must complete the first two acts of Baldur's Gate 3 before reaching the city of Baldur's Gate.

What purpose does the Adamantine Forge serve in Baldur's Gate 3?
The Adamantine Forge is an optional quest line in BG3 that allows players to craft two Adamantine Items from six options: three armor pieces and three weapons. It occurs toward the end of Act One and takes place in Grymforge, an ancient city inhabited by Duergar.

How can players craft Adamantine weapons in Baldur's Gate 3?
Players need a specific weapon mould and one piece of Mithril Ore, which can be found in the Grymforge area, and then activate the Adamantium Forge to create Adamantine weapons.


Published: Aug 9, 2024 02:21 pm