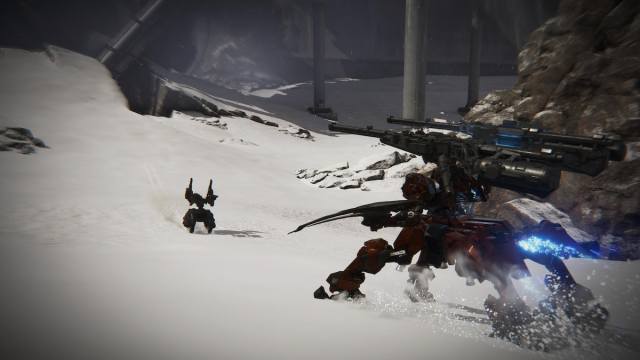
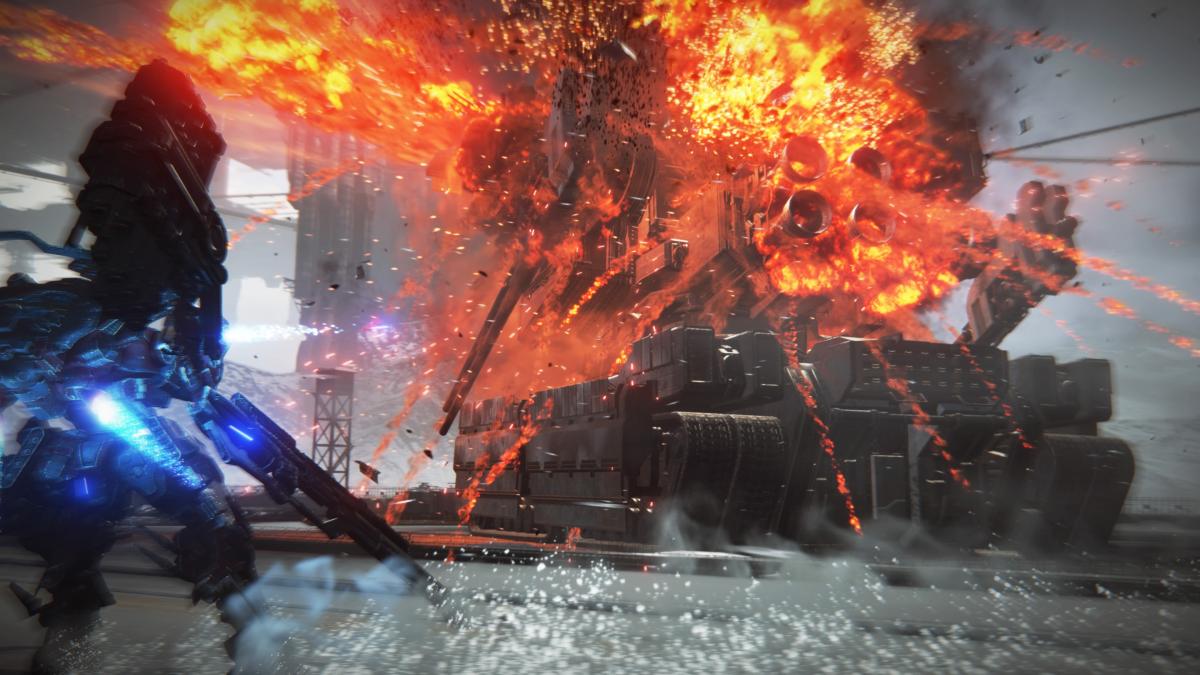
FromSoftware’s Armored Core 6 is packed with secrets from start to finish. Among the hidden collectibles are Combat Logs that you can get by defeating tough enemy mechs, some of whom are hiding off the beaten path in hard-to-reach places.
If you’re an eager collector searching for all the Combat Logs in AC6, look no further. This comprehensive guide includes every Combat Log you can find on Rubicon 3.
What are Combat Logs in AC6?
Combat Logs are collectibles that drop from certain enemies. Picking them up progresses AC6’s Loghunt Program, an optional side quest that’s absolutely worth doing. You rank up by collecting Combat Logs and are rewarded with new AC parts, some of which are considerably powerful. For this reason, it’s a good idea to focus on collecting Combat Logs on your first playthrough—as well as seeking out all of AC6’s hidden parts.
You can tell if an enemy drops a Combat Log by targeting it. There’s a log icon to the upper-left of your reticle if you’re targeting an enemy holding a Combat Log. You’ll find Bronze, Silver, Gold, and Platinum Combat Logs on your journey, each of which contributes an increasing amount toward your Loghunt rank.
AC6 Chapter One Combat Logs
Destroy the Transport Helicopters
The first Combat Log you can get in AC6 is in the fourth mission of chapter one. This one’s hard to miss, so you might already have it. Progress through the mission as normal by destroying the first two transport helicopters, then fly up to the area with the third and fourth helicopters.
There’s a tetrapod Heavy MT here—Walter advises you to ignore the mech and proceed with the mission, but if you destroy it, you get a Silver Combat Log.
Destroy the Tester AC
This is another particularly easy one, and it’s impossible to miss, because you need to defeat the Tester AC to complete the mission. It’s an easy fight, and you’ll have no issue taking him down as long as you keep moving and use your Quick Boost to dodge his missiles. Destroy him to get a Silver Combat Log.
Attack the Dam Complex

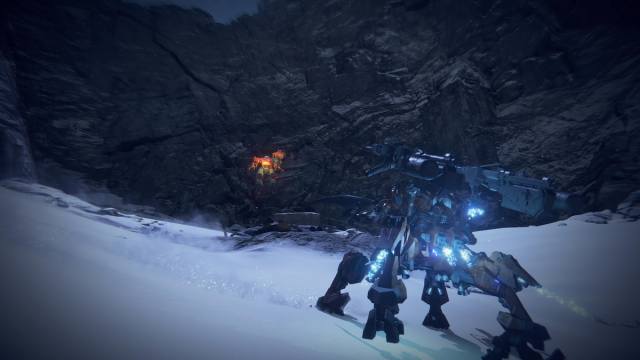
After destroying the two generators and clearing out the MT squad at the beginning of the mission, start heading over the frozen lake toward your next objective. You’ll see two small dams, one on the left and one on the right. Fly over the right-hand dam, and you’ll find a tetrapod heavy MT on the left side at the back of the lake, protected by two mechs on top of the wall.
Destroy these first, and you’ll be free to take on the tetrapod. It can’t fly, so a good strategy is to hover above it with your own tetrapod legs. After defeating it, you’ll get a Silver Combat Log.
At the end of the mission, you’ll be confronted by another AC, Index Dunham. Defeat him before destroying your remaining targets to get a Gold Combat Log.
Operation Wallclimber
You need to destroy three mechs to earn this mission’s Combat Logs. They’re over the first wall, to the left of the city, and near the left-hand level boundary, by some flat-roofed buildings. It’s wise to clear out the cannons and enemies in the first area, but you can head straight for the Combat Logs if you’re feeling brazen. Defeat the three mechs for three Bronze Combat Logs.
Retrieve Combat Logs
This mission gives you four minutes to collect Combat Logs from fallen ACs around the map, but these don’t count toward your Loghunt progress. Instead, you need to defeat Little Ziyi, who shows up after you’ve collected enough Combat Logs. You can ignore her to keep gathering Logs for the mission, but if you fight and destroy Ziyi before the time runs out, you earn yourself a Gold Combat Log.
Attack the Watchpoint
This is another one you can’t miss. After destroying the squads in Sectors 1 and 2, head over the bridge toward Sector 3 and Sulla will confront you. He’s a mandatory mini-boss, and you have to defeat him to continue with the mission, so you’re guaranteed to get his Gold Combat Log.
AC6 Chapter Two Combat Logs
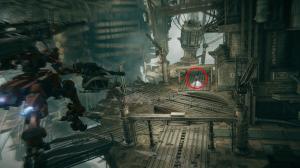
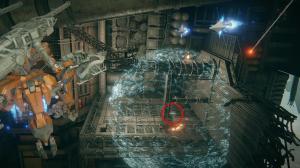
Infiltrate Grid 086
The first mission in Chapter Two is packed with Combat Logs, and most are easy to miss. You’re guaranteed to find the first one, which you get by defeating “Invincible” Rummy. He’s far from invincible, though, and drops a Silver Combat Log.
You have to keep your eyes peeled to find the next few Combat Logs. After defeating Rummy, fly through the gate that opens and head outside. Instead of heading toward the refinery building, where your objective points to, fly up and to the left as soon as you get outside, then double back on yourself.
You’ll see a covered area. Proceed forward, and you’ll find two mechs that drop Bronze Combat Logs on the left. After destroying them, jump over the wall, and you’ll find another two mechs that drop Bronze Combat Logs.
To get the next Combat Log, head toward your objective. You get ambushed by two Toybox MTs while opening the gate, but they’re easy to take down. Next, enter the building. This is where you’ll find three out of four WRECKER parts, and our helpful (and very thorough) AC6 secret parts guide tells you exactly where to find them.
Proceed after dropping down from the ceiling, and you’ll enter a room with a glowing furnace at the top. Fly up to the furnace and land on it. You’ll see a pipe with an opening. Maneuver your AC to land on the rim of the pipe and head through it. It leads to a vertical cylinder connected to a long room at the bottom. At the end of this room is a chest containing the WRECKER Arms, and a mech that drops a Silver Combat Log is waiting to ambush you by the chest.
After getting the Combat Log (and the WRECKER parts, if you don’t already have them), leave the building and fly up and to the right. On a platform below and to the right of your objective, beneath the area with the chest containing the WRECKER Legs, are two basic mechs that drop a Bronze Combat Log each.
That makes eight Combat Logs total on this mission.
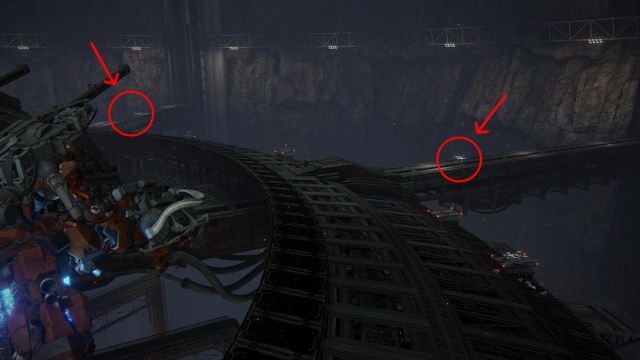
Ocean Crossing
This mission has four Combat Logs to discover, but, fortunately, they’re much easier to find than those in Grid 086. After you leave the elevator, drop down through the indoor area and head through the building interior until you emerge outside near the bridge.
Immediately turn to the right, and you should see two flying drones behind the large rotating cogs by the wall of the building you just exited. They both drop Combat Logs. After killing them, land on the platform just below, turn right, and enter the corridor. At the end of the corridor are two more flying drones that drop Bronze Combat Logs.
AC6 Chapter Three Combat Logs
Steal the Survey Data

Your first Combat Log of Chapter Three is simple. At the start of the level, immediately head right and down the road, past the first group of mechs. You’ll get to a base with a large crane—on the other side of the crane, there’s a tetrapod Heavy MT that drops a Silver Combat Log.
Attack the Refueling Base
Proceed through the beginning of the mission until you reach a bridge over a valley. Beneath and to the left of the bridge, on an elevated ledge attached to the cliff face, you’ll find a sniper LC that drops a Bronze Combat Log.

From the bridge, turn right and head into the valley. You’ll see metal structures connected by bridges on either side of the cliff walls. On a platform at the top of one of these structures is another sniper LC, and it drops another Bronze Combat Log.

Eliminate V.VII
This mission has two Combat Logs to collect. The first is easy to miss, but the second is unmissable. During the stealth section at the beginning, head toward your objective without getting caught. The easiest way to do this is by hugging the left or right side of the map.
After you get to the objective, turn around and head into the city area, but continue being careful to avoid detection. A tetrapod Heavy MT is carrying a shield that drops a Silver Combat Log patrolling the streets behind a few buildings not far from where your first objective was.
For the last Combat Log, head toward your next objective, which is to destroy V.VII Swinburne. He drops a Gold Combat Log upon defeat. Alternatively, if you accept Swinburne’s offer to spare him, you’ll get a Gold Combat Log by defeating the AC that ambushes you, Rokumonsen.
Tunnel Sabotage
After reaching the first objective marker, fly up and to the left instead of proceeding further down into the cave. You’ll find a secret room here with a few standard enemies and a sniper LC at the back, guarding the chest containing the NEBULA Plasma Rifle. The sniper LC drops a Bronze Combat Log.
Survey the Uninhabited Floating City
Progress through the mission until you’ve disabled your second ECM fog control device. Proceed onward and past the flying mechs until you reach a large round structure similar to the one where you found the second ECM fog control device. You’re attacked by a transforming mech that changes from its bipedal form to an aerial mode. Destroy it for a Silver Combat Log.
Eliminate the Enforcement Squads
At the start of the level, instead of heading to the objective, go right, toward the large vertical pipe, following the patches of muddy snow. Head over the verge and down the hill, and you’ll be in an open snowy area.
On the right is a Video Log on a destroyed mech, and you’ll be ambushed by an AC pilot called Ring Freddie when you pick it up. Alternatively, you can find Freddie hiding behind a rock on the left. Either way, he drops a Gold Combat Log.
Note that if you chose the Destroy the Special Forces Craft mission instead of this one, you won’t be able to get the Combat Logs here until your next playthrough.
Attack the Old Spaceport

At the start of the level, don’t jump off the cliff. Instead, head right and hug the level boundary. Jump or fly upward and land on the cliff above, then continue right, following the level boundary until you reach the cliff edge. Fly over the chasm to the other side, where the rounded buildings are. Two LC mechs carrying shields ambush you here and they both drop Silver Combat Logs.

After defeating the two LCs, fly toward the rocket in the middle of the level. To the left of the hangar beneath the rocket, among the buildings at ground level, is another LC with a shield that drops a third Silver Combat Log.
Eliminate “Honest” Brute


There are lots of Combat Logs on this mission, but they’re mostly along the main mission path.
At the start of the level, proceed downward toward the suspended platforms. You’ll shortly arrive at a cluster of suspended platforms, with the middle platforms protected by laser sensors. There are two rolling Heavy MTs here: one on the left side of the left-most platform and one on the right side of the right-most platform. They both drop Bronze Combat Logs.
Fly down toward the objective, and you’ll land on another suspended platform with a giant turntable in the middle. At the end of this platform is a tetrapod MT that starts shooting rockets at you. Destroy it to earn a Silver Combat Log.
Keep going down until you reach the lower platform, where a third rolling Heavy MT deploys an energy shield. Destroy it for another Bronze Combat Log.
You’ll get the final Combat Log in this mission from “Honest” Brute, whom you face at the end of the level. He drops a Platinum Combat Log.
Defend the Old Spaceport
You face off against a single foe in this mission: Raven. He drops a Platinum Combat Log, which is unmissable. It can be a tricky fight, but if you’ve made it this far, we’ve no doubt you’ll manage. If you find yourself having trouble, our detailed guide on how to beat Raven in AC6 is sure to help.
AC6 Chapter Four Combat Logs
Underground Exploration – Depth 2

Fortunately, Chapter Four‘s Combat Logs are a bit more straightforward than the previous chapters. Proceed through the mission as normal and defeat G5 Iguazu. He drops a Gold Combat Log.
After defeating Iguazu, you get ambushed by a mech with a blue laser. Chase it through the chasm until you encounter it again at the end of a long corridor. After it fires at you, the door at the end of the corridor closes, and in a room to the right are two PCA units that both drop Bronze Combat Logs.

Underground Exploration – Depth 3
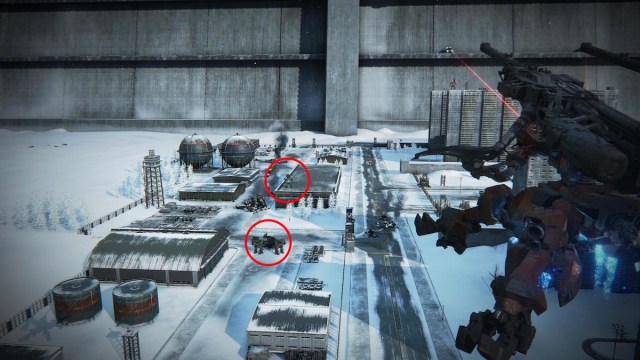
This mission takes place in a large open cave, at the center of which is an enormous circular structure with laser snipers around the edge. The roof of the structure connects to the cave walls via several spoke-like bridges. On two of these bridges, on the opposite side of where you entered the cave, there are MTs that both drop Silver Combat Logs.
Continue through the mission until you face the autonomous defense AC, Ephemera, inside the reactor core. Destroy it for a Gold Combat Log. This one is unmissable, as you have to beat Ephemera to finish the mission.
Intercept the Redguns
There’s only one Combat Log in this mission, and it’s unavoidable. Note that if you choose to Intercept the Redguns, you can’t complete the Ambush the Vespers mission, and its Combat Logs are unobtainable until new game plus.
Your objective here is to destroy G1 Michigan. It’s a tough mission with lots of smaller enemies, and you should make sure to bring weapons with enough ammo to last you the whole mission. He drops a well-earned Platinum Combat Log if you make it to G1 Michigan and eliminate him.
Ambush the Vespers
If you chose the Intercept the Redguns mission instead, this mission (and its combat logs) are unavailable this playthrough. Both Combat Logs here are unmissable: The mission requires you to fight V.V Hawkins and V.VIII Pater, and both drop Gold Combat Logs on defeat.
Unknown Territory Survey
Again, there’s only one Combat Log here, and you can’t miss it. You get it by defeating your old buddy, Rusty. Finish him for a Platinum Combat Log.
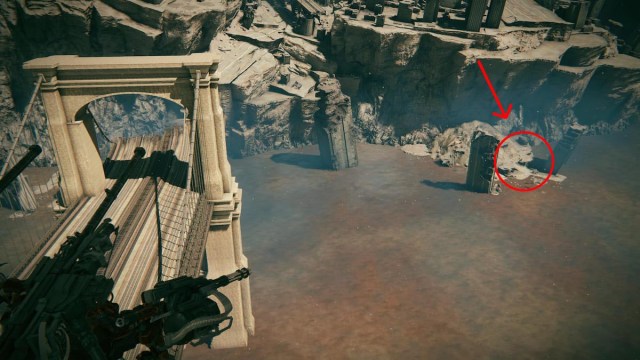
Reach the Coral Convergence

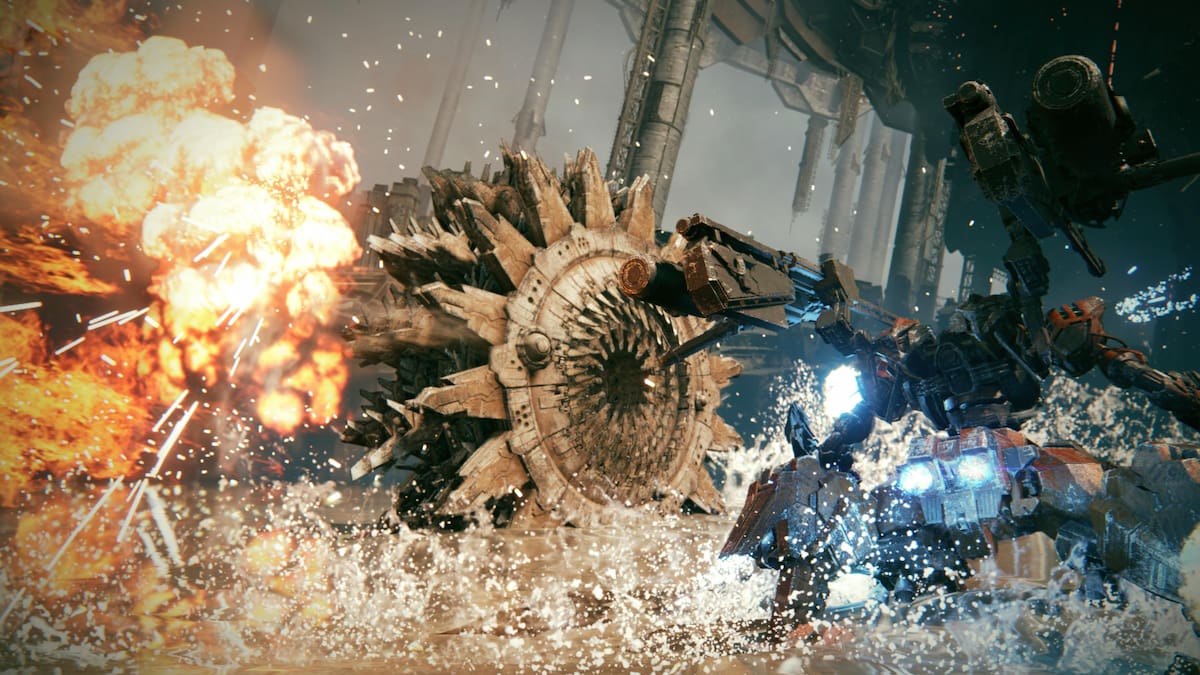
Two Combat Logs are compulsory here, as you need to defeat both V. VI Maeterlinck and G3 Wu Huahai in the city at the beginning of the mission. Destroy them to collect their Gold Combat Logs.
You’ll also get nine Bronze Combat Logs from Autonomous Grinder Wheels. One ambushes you on the bridge, and there are eight beneath the lake, in two groups of four. One group guards a chest containing FromSoftware’s infamous Moonlight Sword below the broken end of the bridge.
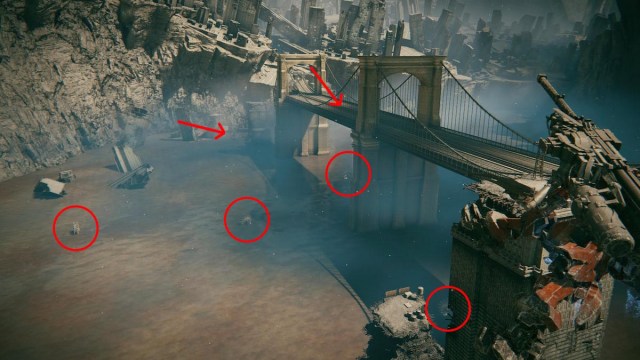
You can see two derelict buildings to the right of the wheels guarding the chest containing the Moonlight Sword. Between them is a destroyed mech with an Image Log. Two hidden MTs on either side wake up and ambush you when you interact with the mech. Destroy them for two Silver Combat Logs.
AC6 Chapter Five Combat Logs
Intercept the Corporate Forces

Chapter Five only has a few Combat Logs. There are two to find on this mission: At the very beginning, fly to the top of the glass roof of the first large structure you encounter, and you’ll be ambushed by an LC that drops a Silver Combat Log.
The second one is unmissable. You have to defeat V.I. Freud, and he drops a Platinum Combat Log. If you choose this path, you lose access to the other path, Eliminate Cinder Carla, and its associated Combat Logs, so you have to get them on your next playthrough.
Eliminate Cinder Carla
This mission is mutually exclusive with the Intercept the Corporate Forces mission, so you’ll have to get these Combat Logs on new game plus if you choose the above path on your first playthrough. Like the alternate mission, all the Combat Logs here are unmissable.
It’s a fairly straightforward mission but still a challenging one, with three tough fights against enemy mechs. You get a Platinum Combat Log for defeating V.II Snail, another Platinum Combat Log for defeating Cinder Carla, and a Gold Combat Log for defeating “Chatty” Stick.
AC6 new game plus (NG+) Combat Logs
Attack the Dam Complex
When you’re playing through this mission for the second time on new game plus, you’ll be contacted by the Rubicon Liberation Front and given the choice to betray your two allies. If you do, you have to fight G4 Volta and G5 Iguazu, which can be tough, but it’s more than doable with the right setup. You get a Gold Combat Log after defeating them.
Prisoner Rescue
Instead of escorting the prisoner, go left at the start of the level. Continue toward the signal towers and you’ll encounter a tetrapod MT to the right of them. Destroy it for a Silver Combat Log, but make sure to do so before the prisoner gets attacked. You also get a Platinum Combat Log by destroying G2 Nile, which is the mission’s final objective.
Defend the Dam Complex
If you chose to betray your allies earlier, this new game plus-exclusive mission sees you defending the same dam against two enemy ACs: Chartreuse and King. Defeat them for two Platinum Combat Logs. They’re both unmissable.
Stop the Secret Data Breach
This mission takes place in the same area as Infiltrate Grid 086. It was packed with secrets the first time, so it’s no surprise that there are more Combat Logs to find here on your next visit. During your first objective, you’ll find a tetrapod MT that drops a Silver Combat Log guarding one of the hacking drones. Then, head down the pipe in the furnace room and drop down the vertical shaft. Three mechs drop Bronze Combat Logs in the long room where you found the WRECKER Arms.
AC6 new game plus plus (NG++) Combat Logs
Attack the Watchpoint
After Sulla ambushes you, turn around and destroy the two MTs behind you. They both drop Bronze Combat Logs. Defeat Sulla to earn a Gold Combat Log.
Survey the Uninhabited Floating City
This mission requires you to destroy Thumb Dolmayan, who drops a Platinum Combat Log.
Underground Exploration – Depth 2
This mission requires you to destroy V.III O’Keeffe, who drops a Platinum Combat Log.
Eliminate V.III
This mission requires you to destroy Coldcall, who drops a Platinum Combat Log.
Unknown Territory Survey
This mission requires you to destroy V.IV Rusty and Middle Flatwell, who both drop Platinum Combat Logs.
Reach the Coral Convergence
This mission requires you to destroy V.II Snail and G5 Iguazu, who both drop Platinum Combat Logs.


Published: Aug 16, 2024 05:24 am