After you unlock the Carpenter in Enshrouded, one of the first quests you’ll get is to explore the Mistbury Catacombs and loot the Queen’s Tomb. While it sounds simple enough, this catacomb can be a bit tricky to navigate.
If you’re having trouble with the Mistbury Catacombs, we’re here to help.
Before you visit the Mistbury Catacombs in Enshrouded

You can go to Mistbury Catacombs in Enshrouded pretty early (at around level five), but I recommend you have the following before you do:
- Unlock the Carpenter (so you can get the Queen’s Tomb quest)
- Be around level seven (ideally higher)
- Bring a few lockpicks
If you’re going to visit the Mistbury Catacombs, you may as well grab the associated quest. This is one of the first quests given to you by the Carpenter, so you may as well grab it for some extra experience and a marker on your map.
Being level seven will help you deal with enemies inside who are at that same level. You can go through it at a lower level, but it’s always best to be prepared.
Last but not least, bring a lockpick. Seriously, don’t make the same mistake I did. Here I was thinking I would find a piece of Scrap Metal while exploring the temple, but, NO. No matter what, I couldn’t find a single piece. So, either have Scrap Metal on you so you can craft a Lockpick or have one already made. You only need one.
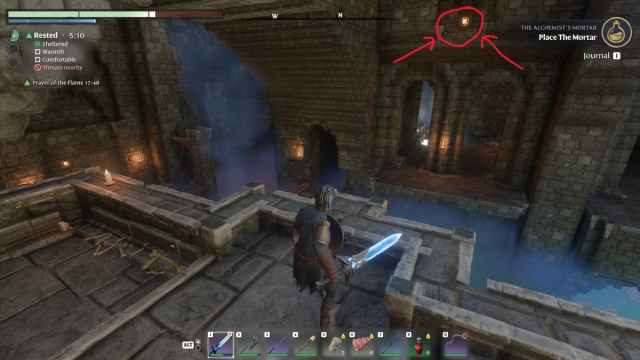
How to get to Mistbury Catacombs in Enshrouded
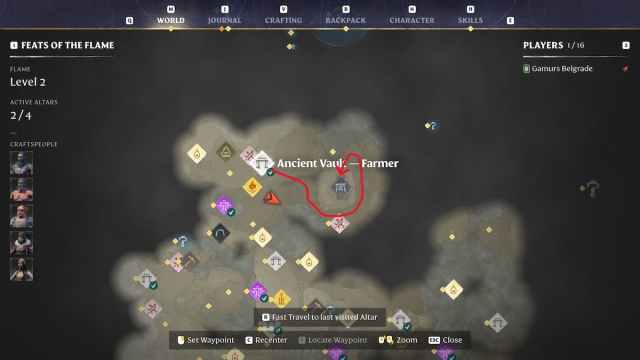
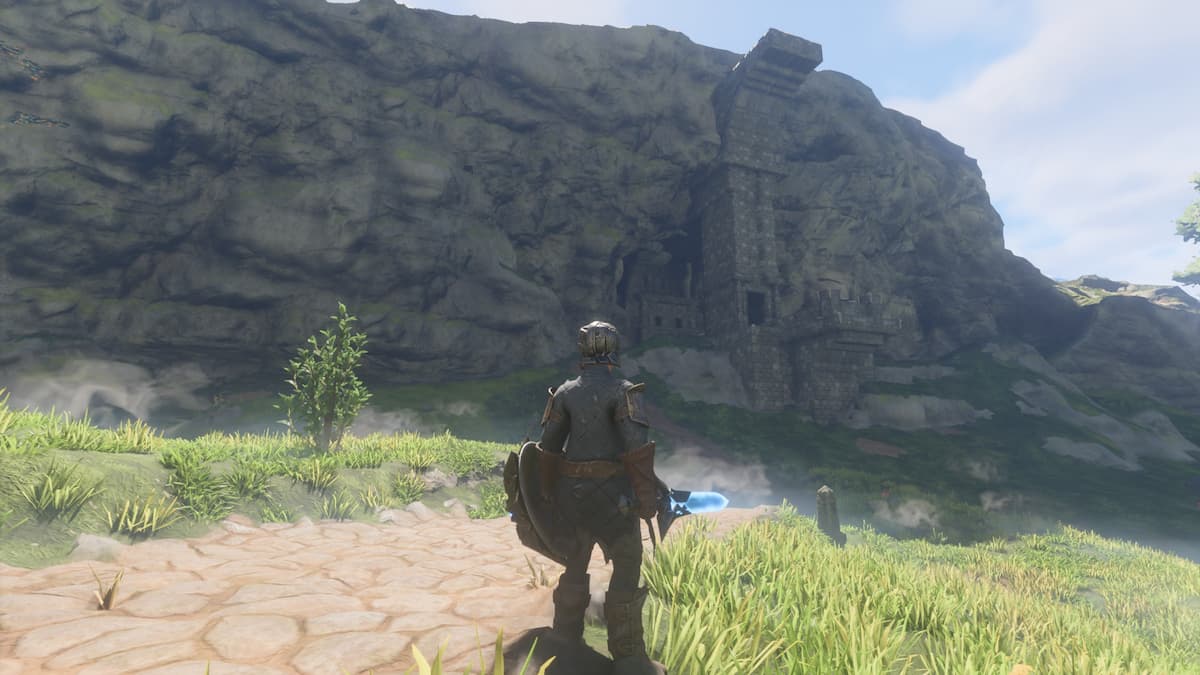
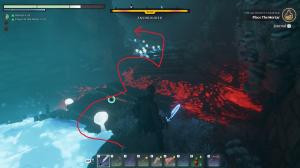
The easiest way to get to Mistbury Catacombs is to head west from the Ancient Vault-Farmer and go around the mountain from the western side (see image). You can’t take the eastern side on foot. Once you get to the northern side of the mountain, you will see the entrance.
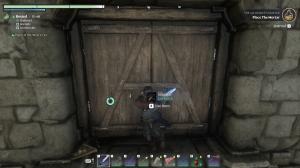
There will be a locked door at the entrance. Use an Axe/Pickaxe (or your main weapon) to break the door. What? Did you think you were going to waste your lockpick on a wooden door? Nah, we’re keeping that for the next bit. Now comes the fun part.
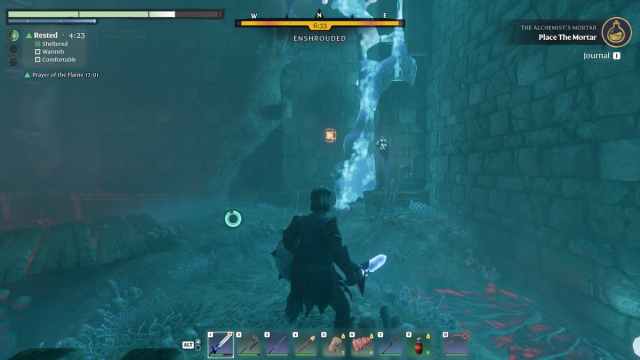
How to solve Mistbury Catacombs and complete The Queen’s Tomb quest in Enshrouded
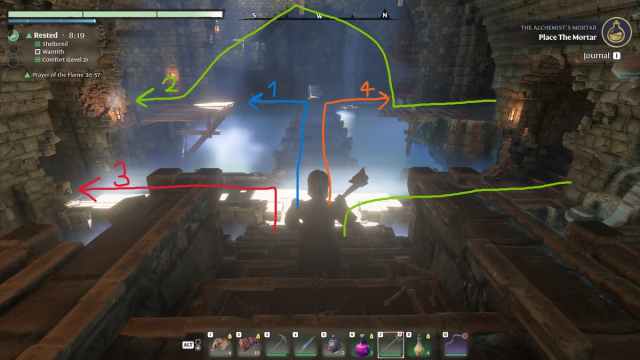
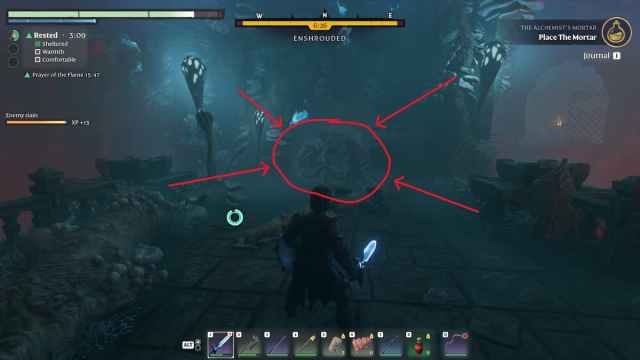
To complete the quest, you need to loot the sarcophagus in the room in front of you. There are four switches you need to activate before the door can open. Each switch will light one of the four lights on top of the door with the sarcophagus. I’ve marked them in the picture above so you can skip ahead if you already have some of them lit. They go in order from left to right. Treat this room as the starting zone for each switch.
Switch One
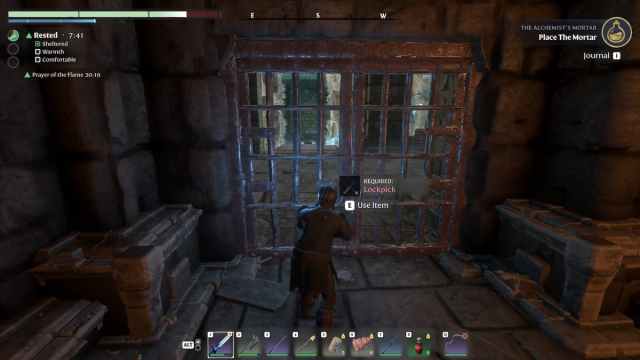
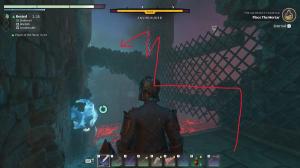
If you are careless like me, this is going to be the toughest. Hopefully, you aren’t and you’ve brought that lockpick. So head down the path and take the second left, climb the stairs, and you’ll see a locked metal door. You can’t break down this door, so use a lockpick.

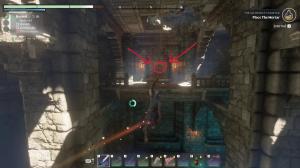
Once you are in, look to your left where there will be a climbable wall. Once you are up, look to the other side; you should spot a switch. You can either shoot it from an arrow or swing your way over using the Grappling Hook to press it the old-fashioned way.
Switch Two
From the main room, take the first right, and after you climb the stairs, make a U-turn. You will be on what remains of a wooden bridge that leads to the other side. Fortunately, there is a metal hook on the ceiling, which you can use to swing to the other side with the Grappling Hook. Once you land there, simply use the stairs and keep going until you come to a balcony that overlooks the main central room.
You should see the second switch on the other side. Shoot it with an arrow, spell, or wand, and you are done. Two down, two more to go.
Switch Three
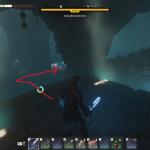
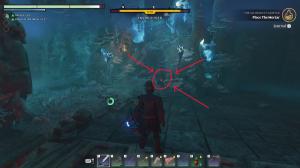
Take the first left from the main room and head down into the shrouded area. You can die here if you aren’t careful. If you do, don’t sweat it because there’s a respawn point at the entrance to the table, and you’re attuned to it.
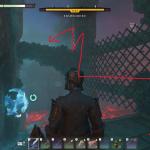
Once you go downstairs, you can either go left or right. It doesn’t really matter, but head left just in case and immediately make a U-turn. You will see a destroyed room with Lava in the middle. Carefully jump over the platforms and head in the direction marked above. Follow this path, and you’ll see a switch on the wall. Press it and head back the way you can. You can also keep going, but it’s more dangerous down that part, so I wouldn’t bother.
Switch Four
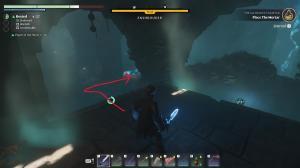
From the main room, take the second path to the right. You will go downstairs and will come to a locked wooden door. Now, by this point, I assume you know how to deal with locked wooden doors, right? Seriously, don’t waste a lockpick on these.
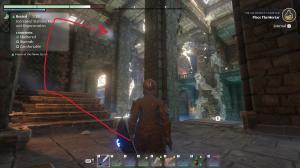
Open the door, and you will see a bridge leading towards… a wall? What? More importantly, bugs are coming out of a hide in front of that wall. Kill the bugs and destroy their nest (an Axe is great for destroying nests). Once you destroy the nest, you will reveal a path. How about that? Keep going down the path and head right (you can also head left for a chest). In the next section, you have to wall climb to get to the next bit. If your stamina is low, don’t forget to stop and rest in the middle. Once you make it across, there will be a balcony with no obvious way to continue. Unfortunately, there isn’t a bug nest this time to reveal the path.
However, there is an inconspicuous exploding barrel next to a wall. Stand back, shoot the barrel, and BOOM, a new path (and an enemy) will appear. Deal with the enemy and keep going. Head up the stairs and behold, two more enemies and a switch. Even better, after you activate the switch, you will also get a shortcut back to the main room.

The reward for completing Mistbury Catacombs and The Queen’s Tomb quest in Enshrouded
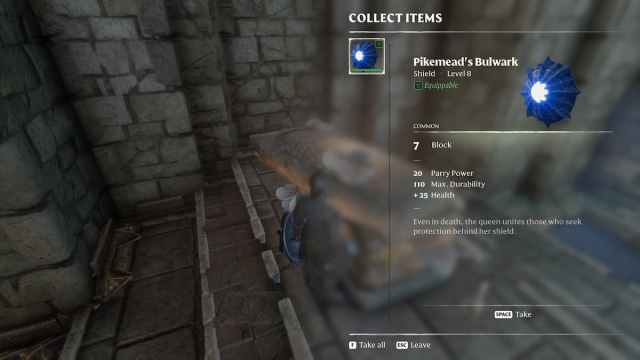
Your reward for completing the Mistbury Catacombs is the Pikemead’s Bulwark Shield. As cool as it looks, it’s only slightly better than the Rising Fighter Shield (the first shield you can make using the Blacksmith). It does, however, give you an extra 25 health, which is nice. After collecting this, pat yourself on the back because you just conquered the Mistbury Catacombs.


Published: Jan 31, 2024 06:30 pm