Whether you’re aiming to upgrade one or more computer specifications, identify each component to maximize performance, or are just curious to see what’s under the hood of your PC, checking computer specs is helpful and easy to do.
Depending on what particular spec you need to identify, the steps vary slightly, because unfortunately, not everything is in the same place—that would be too easy. Windows gives users the tools to identify computer specs, including the CPU, GPU, RAM, motherboard, and more.
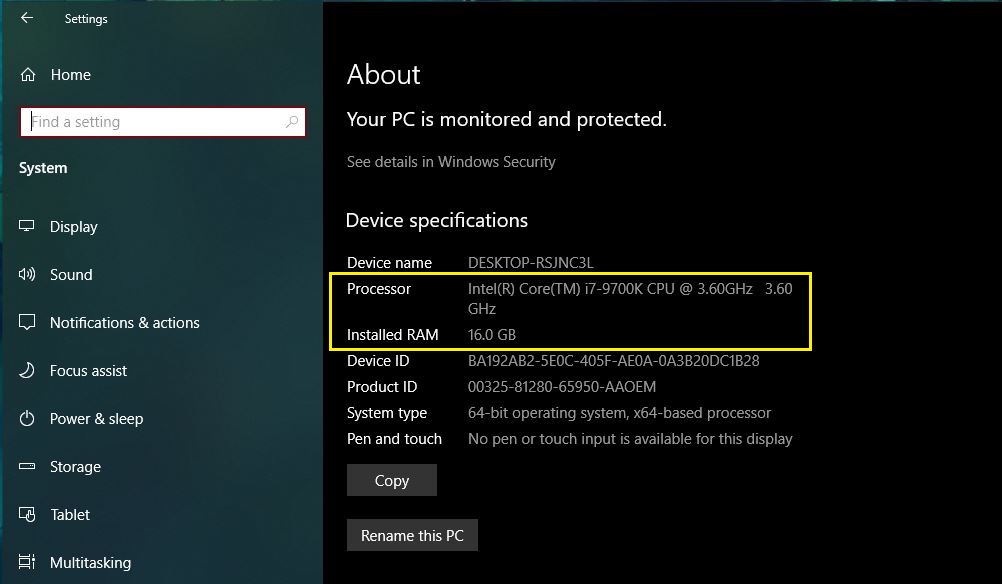
How to check the processor (CPU) and memory (RAM)
- Click on the Windows Start menu icon located at the bottom left-hand corner of the screen.
- Click on the Settings icon (the gear icon).
- In the Settings menu, click on System.
- Click on About, located at the bottom left-hand side.
- Processor and Installed RAM is listed under Device Specifications.
How to check the graphics card (GPU)
- Right-click on the Windows Start menu icon located at the bottom left corner of the screen.
- Click on Device Manager.
- Click on the drop-down arrow next to Display Adapters to reveal the GPU.
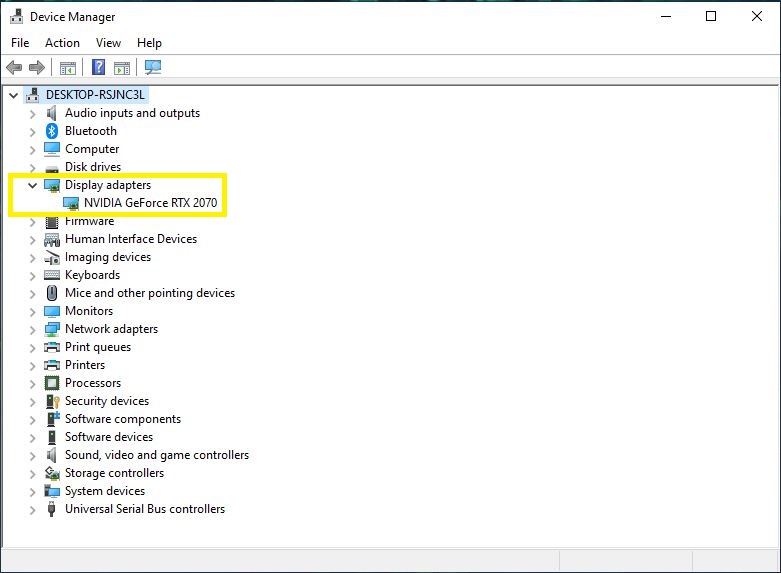
Display Adapters might show two options. If it does, that means it’s showing the integrated graphics of the processor and the dedicated graphics card of the system. The dedicated graphics card option is considered the GPU.
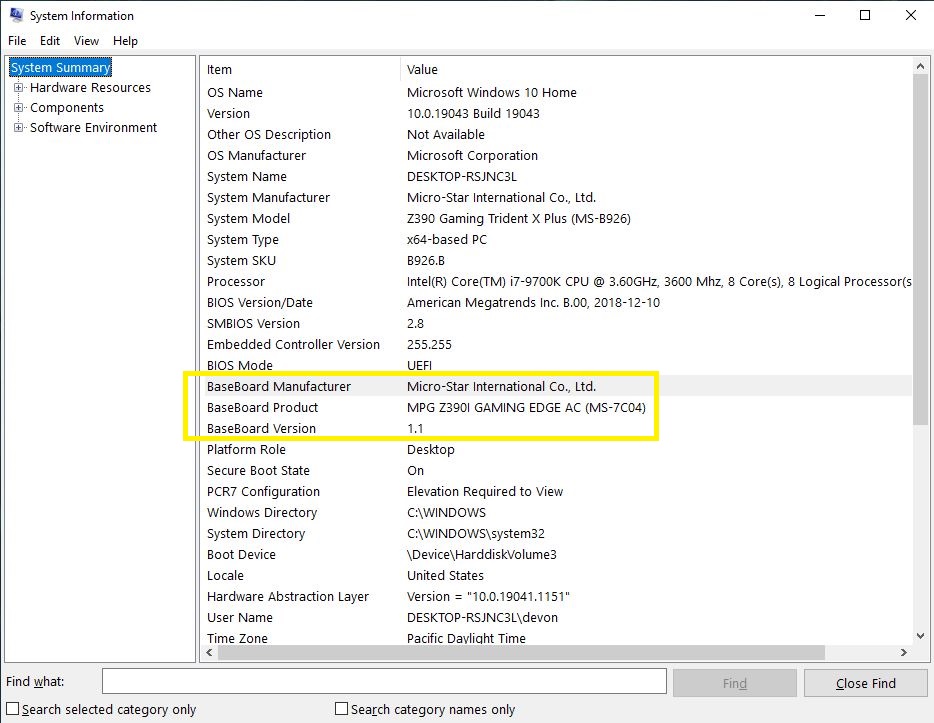
How to check the motherboard
- In the Windows Search Bar located right next to the Windows Start menu icon, type in “System Information.”
- Under the Item column, scroll down to Motherboard Manufacturer/Baseboard Manufactuer.
- The motherboard information is located to the right.
Knowing the type of hardware inside of a computer can assist in deciding whether or not it’s time for an upgrade. Upgrading components isn’t as simple as picking out the latest and greatest parts and installing them because newer hardware doesn’t always mesh with older hardware and vice versa. Sometimes a complete computer upgrade is a better bet depending on the age of the components. So, it’s important to do some research beforehand.





Published: Sep 20, 2021 11:15 am