Bluetooth uses radio-wave technology to allow communication between compatible devices, letting users pair wireless devices to their computers. For instance, Bluetooth can also connect a wireless mouse or headset to a laptop or PC, conveniently cutting down on wired peripherals, supporting a cleaner setup. Many gaming peripherals on the market nowadays are wireless and come with Bluetooth technology, so it’s important to know how to pair them.
This guide showcases a couple of easy ways to enable Bluetooth for Windows 10. Just make sure you have Bluetooth compatibility integrated on your computer, along with the device you’re aiming to pair. Almost every laptop or PC has Bluetooth installed nowadays, but older rigs might not.
How to enable Bluetooth and add a device through Windows Settings
- Click on the Windows Start menu icon located at the bottom left-hand corner of the screen.
- Click on the Settings icon (the gear icon).
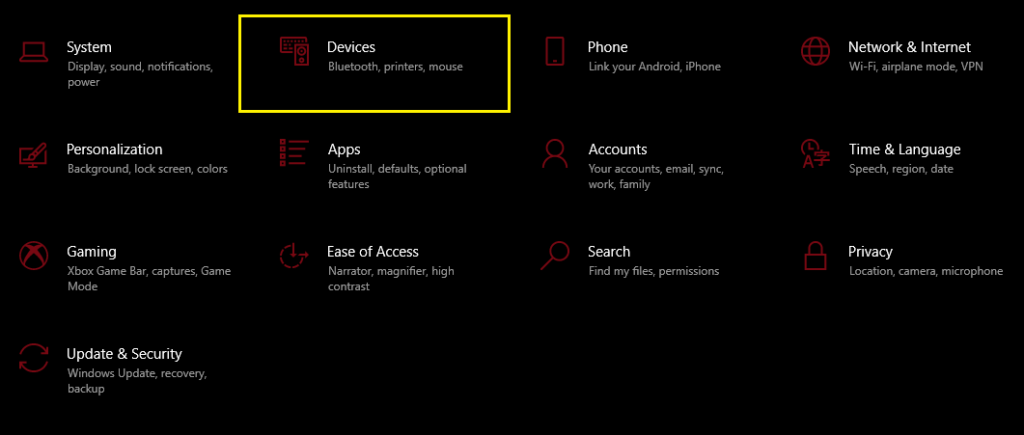
- In the Settings menu, click on Devices.
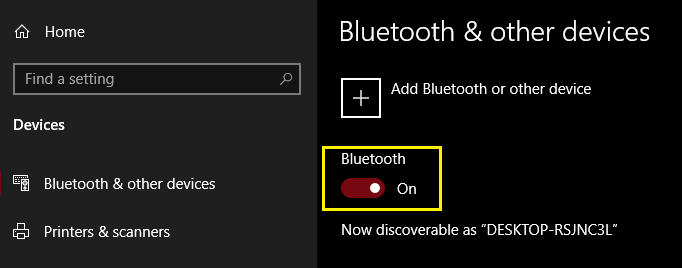
- Locate Bluetooth, and select the On/Off icon.
- Once enabled, select Add Bluetooth or other device.
- Choose the type of device you wish to pair.
- Windows will prompt with the message, “Make sure your device is turned on and discoverable. Select a device below to connect.”
Alternatively, Bluetooth can be toggled on or off through another, quicker method.
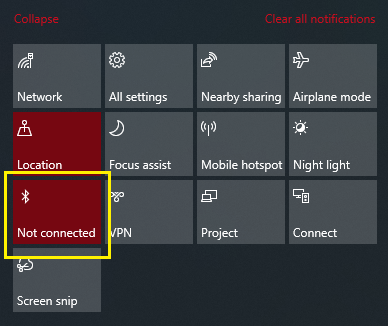
- Click on the chat bubble, located at the far right-hand corner of the taskbar.
- Click on Expand if only four tiles are showing.
- Select the tile with the Bluetooth logo, which toggles Bluetooth on and off.
Note that for Windows 10 to recognize a nearby compatible device, Bluetooth must be enabled for that device as well. Depending on the device in question, enabling Bluetooth is located somewhere within the settings, so some digging around might be required.







Published: Sep 27, 2021 03:40 pm