A clean install of GPU drivers should be performed after every major Windows update—or if any unusual performance issue emerges. This rule of thumb is especially true for GPU drivers. They’re prone to problems due to frequent updates, meaning you may be required to start from scratch when issues pop up.
Why removing then reinstalling GPU drivers is recommended
Whenever upgrading drivers, it’s recommended to remove the current drivers before installing the new ones. Although not mandatory—especially for minor updates, it can help make the transition go more smoothly. Drivers aren’t perfect; sometimes a new update introduces a new issue.
Preparing for a clean removal, downloading new drivers
It’s recommended to have your new drivers downloaded and ready to install before removing current drivers.
The best course of action is to download drivers directly from AMD, Nvidia, or Intel’s official websites. From each of their websites, navigate to the make and model of your GPU.
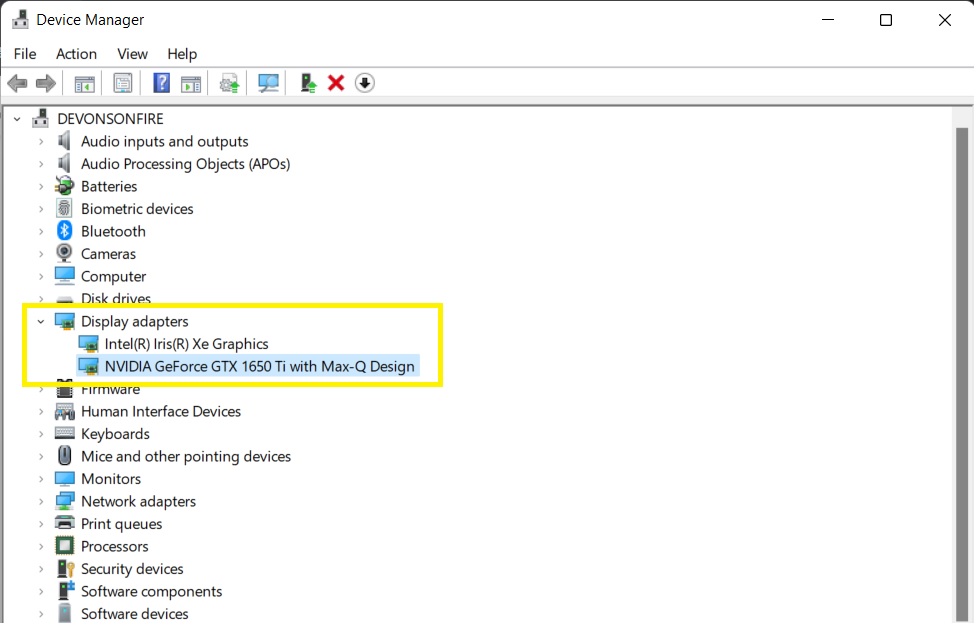
To find your GPUs make and model, navigate to Device Manager and locate Display Drivers.
Now that you’ve identified your GPU and downloaded the proper drivers, it’s important to save all of your important files—because you’ll need to reboot your PC at least once during this entire process.
How to fully uninstall current drivers
Utilizing Display Driver Uninstaller proves the preferred method for PC enthusiasts.
DDU is a driver utility program that allows users to remove all traces of Nvidia, AMD, or Intel drivers from Windows. DDU is especially useful when you cannot upgrade existing drivers due to conflicts with an older installed version. Sometimes, leftovers like registry keys, folders, files, and the like may be left behind, compromising future updates and installs.
In short, DDU is thorough—capable of removing everything (or almost everything) related to GPU drivers.
How to uninstall GPU drivers with Display Driver Uninstaller
Before jumping into the software, be sure to read through DDU’s recommended usage notes.
Head over to the Download & Support page. From there, locate the official download link. Click that to begin the download. Then, run the executable and extract the file to your PC.
From here, you’ll receive a folder titled DDU (version)—depending on the current version. In there, locate Display Driver Uninstaller.exe and run it. Before it does its thing, you’ll see a list of available options.
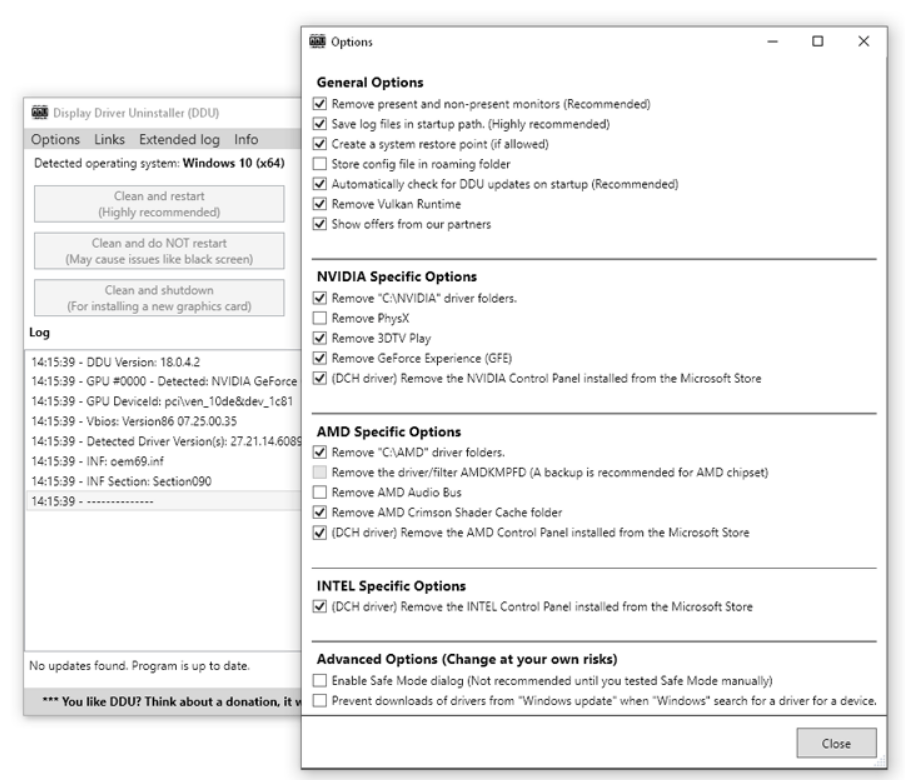
You’re welcome to select or deselect these options. However, it’s best (for most users) to hit Close unless you’re confident in the options you’re adjusting.
Now, navigate to Select device type and choose GPU. By default, DDU chooses one of your GPU drivers to clean—which can be a problem if you have multiple.
Lastly, select Clean and restart. DDU will proceed to remove your drivers and automatically restart your PC.
DDU is a solid solution to fix current issues suspected to be driver-related. As mentioned, it’s the ideal option for more significant updates or if driver-related problems emerge.
Alternatively, you can uninstall drivers directly through Windows.
How to uninstall drivers through Windows
- Right-click on the Windows button.
- Select Search, enter Uninstall Program.
- Select the option for removing programs: The feature is titled Uninstall a program or Add/Remove programs depending on your Windows version.
- Select and uninstall the older drivers (Nvidia, AMD, or Intel).
- The Nvidia uninstall provides an option to uninstall all Nvidia software components.
Now that your drivers are completely removed, simply install your new drivers.


Published: Feb 18, 2022 01:07 pm