When used correctly, Sprinklers are incredibly powerful tools capable of drastically lowering your farming workload in Stardew Valley. But to make the most of them, you have to use the best Sprinkler layouts possible.
There’s a lot of freedom to customize and personalize your farm to your liking, which can make figuring out the best way to lay things out tricky. If you want to have the most efficient farm, you need an effective Sprinkler system to go with it. Here are the eight best Sprinkler layouts in Stardew Valley.
Best Sprinkler layouts in Stardew Valley
The best Sprinkler layout in Stardew Valley varies depending on what type of Sprinkler you’re working with, so here are all of the best layouts with some different options to match the varying abilities of each type.
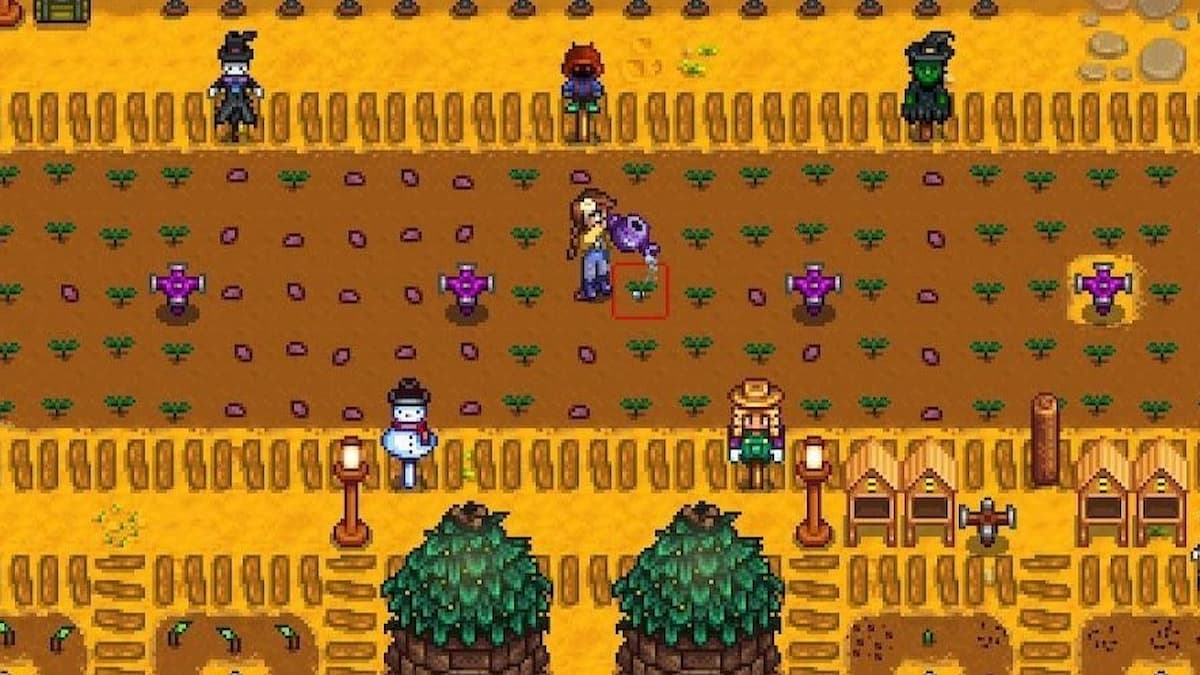
1) Strong Sprinkler and Scarecrow layout
If you want your crop-growing system to be as efficient as possible, you can combine a strong Sprinkler layout with a strong Scarecrow layout. Considering both of these important tools together when figuring out your Sprinkler placement allows you to make the safest and most effective farm possible.
The above layouts are examples of ways you can lay out the different types of Sprinklers with Scarecrows to ensure all your crops are getting watered and staying protected. There are some empty spots around the edges of these designs, but it’s easy to mix and match between pieces of these designs with different Sprinklers to optimize your layout.
2) Starter Sprinkler layout
When you’re just starting off and only have the weakest Sprinklers to work with, you have to be extra precise with how you lay them out if you want to build up your crops as quickly as possible. This layout is the most efficient way to use the classic Sprinkler since it only waters four adjacent tiles.
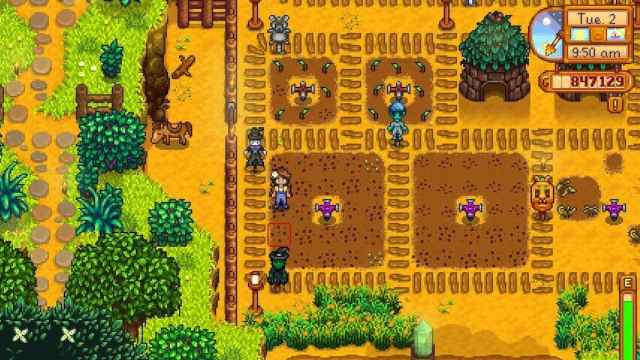
3) Junimo Hut crop field Sprinkler layout
This layout provides a compact farm with a highly efficient design based around the helpful Junimo Huts. Junimos harvest all crops within a 17×17 range around their home, which is why this design places four of them throughout a massive field alongside many Iridium Sprinklers and Scarecrows.
If you want to take your farm to the next level, incorporating Junimo Huts into your Sprinkler layout is the way to do so. This layout is also a great way to craft a massive field of crops that looks great and is highly productive, too.
4) Mix and match Sprinkler layout
I’ve tried all the best ways to optimize my farm layout with Sprinklers, but I personally prefer just mixing and matching different designs to give my farm a unique and efficient look, so this is an option you can consider too. I like having paths outline all of my crop areas so I can travel around with ease and because it gives the farm a cleaner look.
To use this type of Sprinkler layout, you should mostly mix and match between the Iridium Sprinkler and the Quality Sprinkler. I usually start by using paths to outline the areas before doing any hoeing so I can easily make changes as needed before then placing down the Sprinklers and digging the area around them.
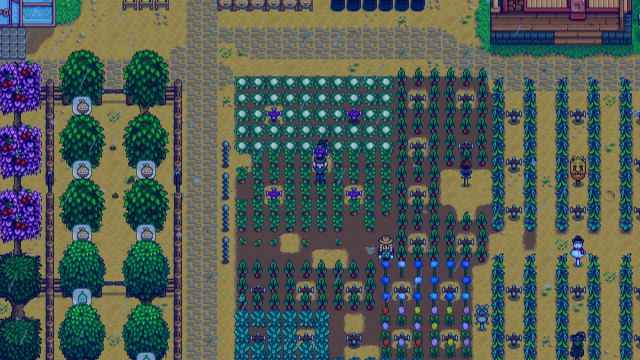
5) Organized Sprinkler layout
This design is another one that focuses on using all of the best items for farming, including Iridium Sprinklers, Junimo Huts, and Scarecrows. What’s different about this layout from most others is it uses flooring around most of the farm to prevent debris like rocks and logs from spawning.
This makes for a super clean and organized look that provides plenty of space for farming. All of the Sprinklers are set up to cover a wide radius and the Scarecrows are perfectly placed to protect the crops from harm. Lastly, the four Junimo Huts grant you some helping hands as the Junimos will grab all crops around them. There’s plenty of space to grow all kinds of crops like Carrots and Powdermelon here.
6) Casual Sprinkler layout
If you’re not into the idea of having massive areas dedicated to farming because you plan to make gold in other ways, you might consider a more casual Sprinkler setup. This type of design is great if you just want to place some crop areas randomly around your farm wherever they fit in.
All you have to do to use this Sprinkler layout is make patches that perfectly line up with each type of Sprinkler. The regular Sprinkler covers four tiles, the Quality Sprinkler covers eight tiles, and the Iridium Sprinkler covers 24 tiles, so you can easily fit all four types around your farm wherever you find space.
Using this Sprinkler layout system will look slightly different for each farm type since all of them have varying amounts of space to work with, but this is one of the best layout options because it works well with any design.
7) Iridium Sprinkler patches layout
This layout covers most of your farm with crops in neat patches that perfectly line up with the coverage Iridium Sprinklers provide. If you’re hoping to fill up most of your farm with crops, this is the best layout to use since it allows you to maximize your space usage while also keeping your farm looking clean.
To ensure the efficiency of this Sprinkler layout, sprinkle Jumino Huts and Scarecrows throughout so you have help managing and protecting your crops. It can also be helpful to lay out the paths you want to use around first to mark out the space before you spend time actually getting the ground ready for crops with your Hoe.
8) Greenhouse Sprinkler layout
You can’t forget to apply a strong Sprinkler layout to your Greenhouse, so you also need to use the best design possible for it. You’re working with a fairly small and compact amount of space in this building, so the way to optimize it is by using six Iridium Sprinklers strategically placed around the room.
If you have Pressure Nozzles unlocked, you can enhance this design even further using only four Iridium Sprinklers with this upgrade. The six Iridium Sprinklers are the most attainable option, though.


Published: Mar 21, 2024 12:02 pm