If you’ve been playing VALORANT on a hard disk drive (HDD), the loading times into maps may suffer. While you can always purchase an SSD to improve your loading speed, you will eventually need to move VALORANT’s installation folder to your new storage device for immediate improvements.
Upgrading to a new drive may not always be the sole reason behind wanting to move VALORANT‘s installation folder around. If you have installed it on the wrong drive during your first installation, you can always change it at a later date.
While VALORANT‘s file size might be less than triple-A titles, it may still make you wonder about how much time it takes to move its installation folder around their drive. Thanks to modern writing and reading speeds, moving VALORANT‘s files to another drive shouldn’t take more than a few minutes.
Here is our guide on how to move VALORANT to a different drive without uninstalling the game.
How to change VALORANT’s install path
During VALORANT‘s installation, the game will automatically select an install path. Most of the time, the launcher will be able to pick the drive you’re mostly using, but there will be times when you might want to change the installation directory for VALORANT.
- Head over to VALORANT’s website.
- Click on the “Download” button.
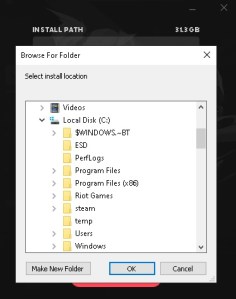
- Launch “Install Valorant.exe” and choose “Advanced Options.”
- Search for the directory to which you’d like to install VALORANT and proceed with the installation process.


How to move VALORANT‘s installation folder to another drive without reinstalling
Need to move the VALORANT installation folder somewhere else or to a new drive? You might need to if installing or reformatting additional storage devices.

- Right-click VALORANT’s icon on your desktop and choose “Open File Location.”
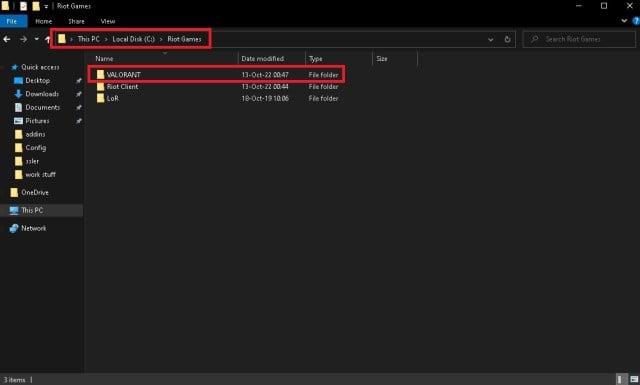
- Click on “Riot Games” on the address bar.
- Doing so will forward you to a new folder where you’ll see “Riot Client” and “VALORANT” folders.
- Right-click on the VALORANT folder and choose Cut.
- Navigate to your preferred installation drive and create a folder called “Riot Games.”
- Open this folder and right-click to Paste the VALORANT folder you previously cut.
- Launch VALORANT through the Riot Client and select Play.
- An error will pop up, and the Play button will turn into “Install.”
- Choose Install and then click on the folder icon next to the install path.
- Enter the file location used in steps five and six.
- After manually entering your new file location, the launcher will be able to detect your game files, and the Install button should become a Play button once again.
Having trouble moving VALORANT‘s installation folder?
You may have finally found the perfect directory for the game, but it doesn’t mean that you’ll be free of all VALORANT error codes. Regardless of where you install VALORANT, errors related to server outages or other Riot-related reasons can delay your gaming experience. If errors are becoming more frequent after moving the installation folder, then you may just have to start from scratch and reinstall.
This also might be your best option if the game won’t start at all or if you start getting Riot Vanguard error messages that prevent you from installing.
Hopefully, this guide has helped you change the VALORANT installation folder without error or having to reinstall.


