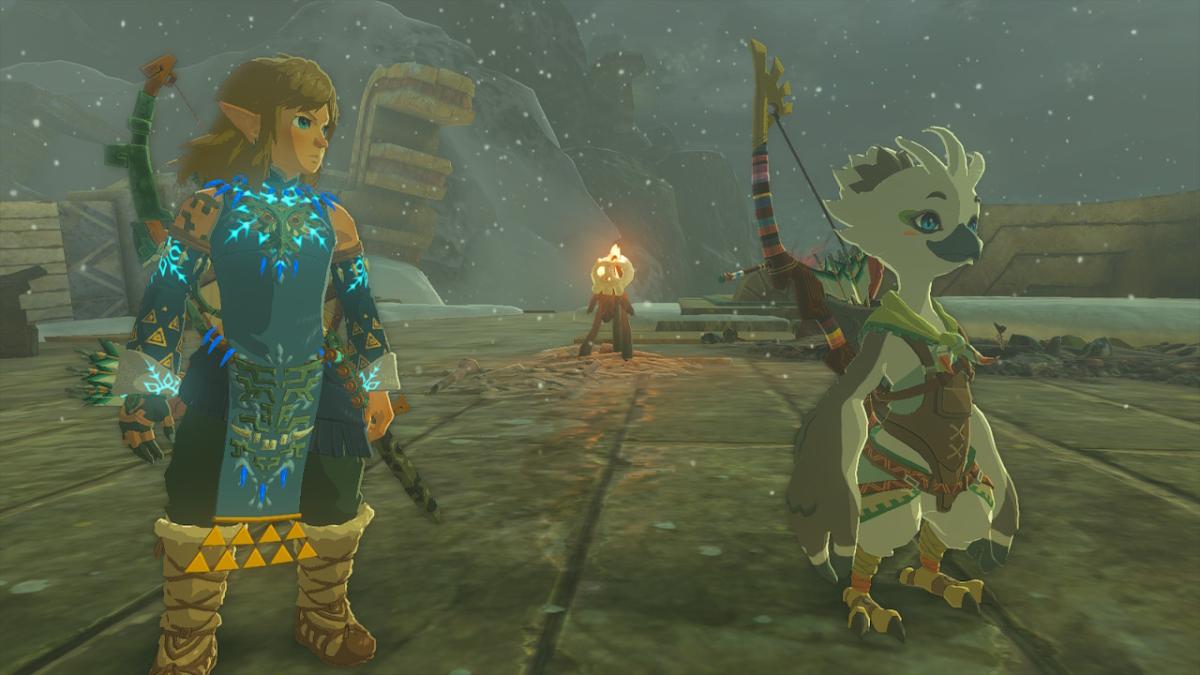
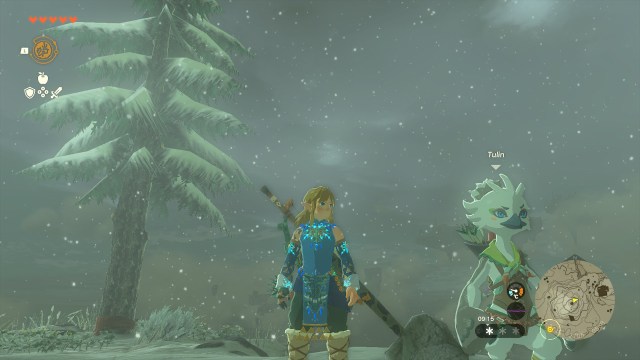
Tulin of Rito Village is a main quest in The Legend of Zelda: Tears of the Kingdom. The quest starts when you reach Rito Village and speak to Tulin and Teba during the Regional Phenomena main quest.
In this walkthrough, I will take you through the entire quest, including how to get to the starting point, and guides to each section of the quest.
How to get to Harth in Tulin of Rito Village in Zelda: Tears of the Kingdom
After you speak to Tulin and Teba, the best way to reach Harth at the Hebra Trailhead Lodge is to jump from Rito Village and glide north. You can jump directly from the platform where you meet Teba or, even better, go a little further up Rito Village, where you’ll find a kind of diving board pointing almost directly at the two bonfires near the lodge.
Don’t try to glide all the way across though (unless you’ve somehow got a lot of stamina already). Instead, glide a little to the right, and stop for a rest on top of the rock pillar. Speak to Harth and he will tell you about Tulin’s wind-gust technique, and your next objective will be to find Tulin in the Hebra South Summit Cave.
Related: Where to find Kakariko Village in Zelda: Tears of the Kingdom
Where to find the Hebra South Summit Cave in Zelda: Tears of the Kingdom
Leave the Hebra Trailhead Lodge and climb the two nearby ladders. Follow the path north and you’ll soon see Cecili standing by a campfire. Talk to her and she’ll point you in the direction of Tulin. Continue up the trail until the path splits in two at a large flag. Turn left to find the entrance to the Hebra South Summit Cave at the coordinates -3394, 2496, 0313.
Hebra South Summit Cave walkthrough in Zelda: Tears of the Kingdom
Speak to Laissa inside the cave, where she will helpfully decline to show you the way to Tulin. Head east into the cave, avoiding or burning the thorns as you go. Glide up the column of wind and into the tunnel leading north from the top. At the end of that tunnel is a chamber with a little island in it. Use the flint to light the fire, then drop a Hylian Pine Cone onto the fire, and glide (just like you did when getting into Rito Village) to the upper ledge on the resulting wind.
Follow the next tunnel and speak to Gesane, who’ll tell you that you just missed Tulin, who has flown off on his own to pursue some monsters. Gesane also tells you that they last saw the monsters near a lone cedar tree on Talonto Peak.
Where to find the lone cedar tree and Tulin in Zelda: Tears of the Kingdom
Continue past Gesane and climb out of the cave. Talonto Peak is north and a little east of where you emerge from the cave. The map marker was highlighting some random spot closer to the cave exit for me, so if you have the same problem, just ignore it. There is a road leading up to the peak, but it’s well-guarded, so you can just climb directly up the mountainside to avoid them. Tulin is standing at the end of the outcrop near the cedar tree at the coordinates -3158, 2690, 0568.
How to get Tulin’s bow back and defeat the monsters in Zelda: Tears of the Kingdom
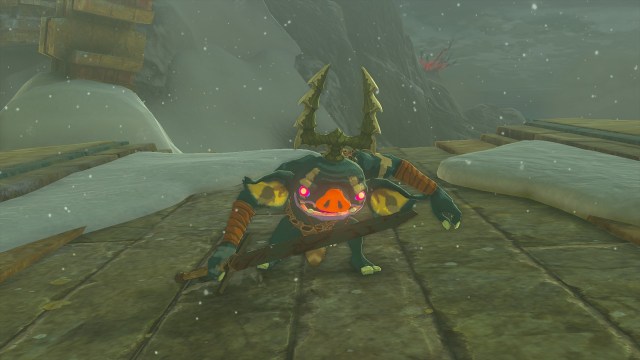
After speaking to Tulin, say “Let’s go!” then aim a gust northeast towards the ruin that the monster is flying over. Jump and glide over to the ruin, then shoot down the monster with your bow. Attaching a Keese Eyeball or Aerocuda Eyeball to the arrow will make this easier. The monsters aren’t too tough to beat, so no need to use the gust ability in this fight. And remember, if you fall off the platform (like I did), you can use Ascend to get back up.
How to reach the sky islands above Hebra Peak in Zelda: Tears of the Kingdom
If you look northeast from the platform where you fight the monsters and meet Harth again, you’ll be able to see a route up to the sky islands via various ruins, platforms, and mountains. Use Tulin’s gust to glide over to the base of the first ruin, then climb to the top of it. From there, gust and glide to the platform sticking out of the mountainside to the northeast.
Gust and glide north to the next platform, then head east up the ridge. Turn right and go to the highest part of the ridge, then gust and glide to the platform to the east. Now gust and glide northwest from platform to platform, climbing and ascending to reach higher platforms when necessary. On a platform at the very top of Hebra Peak, you’ll meet Huck.
From that platform, gust and glide to the northeast. Stack the blocks one on top of the other, then climb onto the stack and ascend to the platform above. Gust and glide to the right side of the semicircular part of the next platform, then go around the semi-circle and ascend twice. Glide to the central pillar and climb to the top, then gust and glide west to the platform under the next pillar.
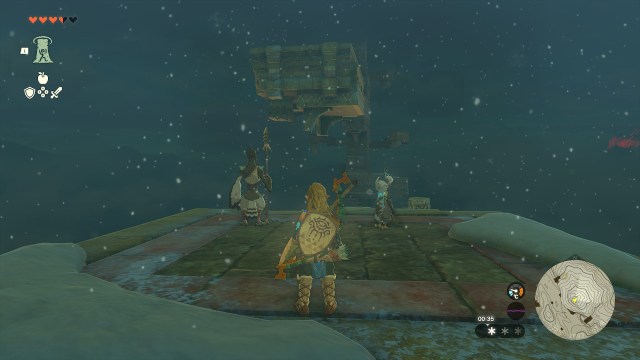
Stand directly under the pillar and ascend all the way up through it to reach the Rising Island Chain. Head towards the Shrine you can see to the east, and Tulin will tell you that it was around here that he saw Princess Zelda and you’ll spot a boat. Talk to Tulin again, and you’ll hear a voice in the sky, and see a huge flying ship in the cloud above.
How to get to the cloud in Tulin of Rito Village in Zelda: Tears of the Kingdom
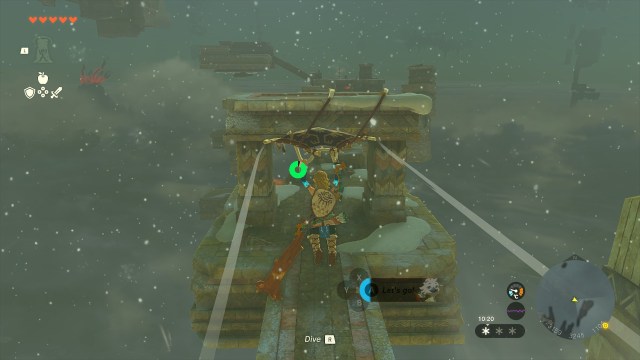
Go up the stairs then drop off the end of the platform onto the bouncy ship sail below, which will launch you high enough to glide to the Mayaumekis Shrine. You don’t have to complete the Shrine to continue the quest, but you might as well while you’re here (Hint: remember you can shoot arrows while in mid-air).
Now it’s back to following the main chain of ruins, first to the northwest, then up, then back southeast to the base of the cloud. It’s mostly more of the same gusting, gliding, fighting, climbing, block-stacking, ascending, and bouncing that you’ve done already. Remember to jump on any ice circles you come to, and to smash fractured rocks with a melee weapon, preferably a rock hammer.
There’s a bit on the way back southeast where you’ll fight a gang of constructs and it’ll look like there’s a bridge leading southeast. Don’t be fooled (like I was). Ascend to the top of the archway, and then gust and glide the length of that bridge. If you run across it, it collapses.
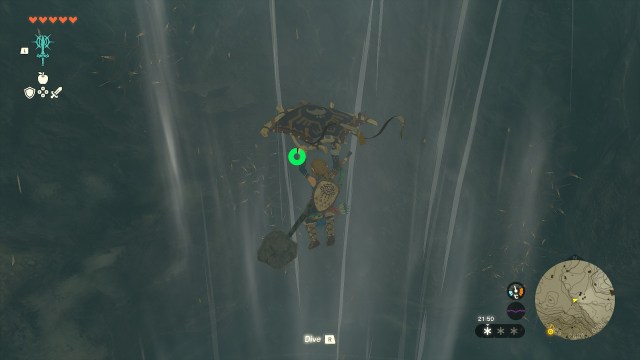
There’s also a bit where you have to make balloons. Attach a balloon, square platform, and flame emitter together like in my screenshot. Then stand on the platform and give the flame emitter a whack. Jump and glide from your balloon to the platform to the northeast. After you ascend the pillar here, you have to go back northwest again. I’m sorry, I really thought we’d only have to backtrack once, but no…
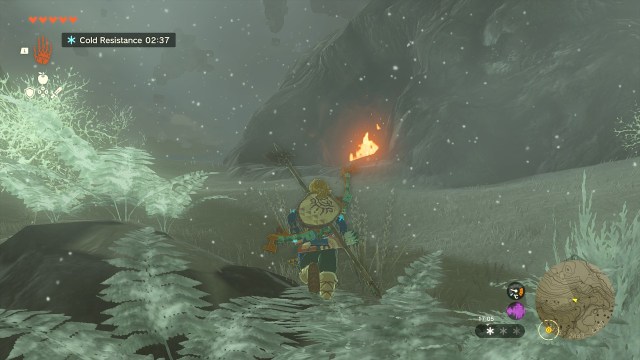
The next section is seriously cold, so if you don’t have warm enough clothing, eat some spicy food to keep warm. Soon, you’ll reach the Kahatanaum Shrine, which is an opportunity to create a waypoint. That means that if you don’t have any spicy food or warm clothing, you can go and get some and then fast travel back here. This is a Rauru’s Blessing shrine too, so there’s no challenge, just a free Light of Blessing.
Next, you have to bounce from boat to boat, getting higher and higher until you reach a huge set of stairs with a stationary boat at the end of it. From that one, bounce to one of the boats circling the top of the cloud, then dive into the cloud to reach the Wind Temple. Once you’ve found the five locks and beaten Colgera, you’ll watch a lot of cutscenes before the Tulin of Rito Village quest finally completes.


Published: May 26, 2023 11:13 am