
The latest Personal Order in Helldivers 2 tasks you with killing 100 enemies with a Gatling Sentry. Here’s everything a Helldiver should know about the Gatling Sentry, including how to get it and properly use it on Democracy’s enemies.
How to get Gatling Sentry in Helldivers 2
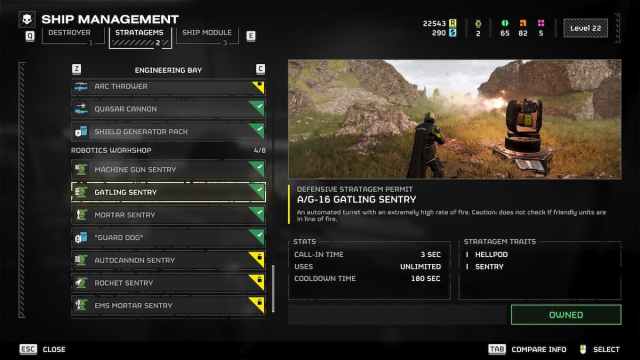
The A/G-16 Gatling Sentry in Helldivers 2 is the second Stratagem in the Robotics Workshop section. It costs 4,000 Requisition Slips and requires you to reach level five to unlock it.
You can call in the Gatling Ssentry using the following Stratagem code: ▼▲▶◀. Once you call it in, it will deploy for three seconds and fire at enemies in its vicinity until its ammo reserves are depleted. You get unlimited Gatling Sentries on your mission, although they have a cooldown of 180 seconds.
The Gatling Sentry is a powerhouse when it comes to clearing enemies, thanks to the high rate of fire. But remember that it can mow down friendly Helldivers just as quickly. With how unpredictable the Sentry’s targeting system can be, I suggest taking cover or diving on the ground when calling it in.
Another thing to note is that the Gatling Sentry can be destroyed before it fires all of its rounds. Whether it’s a Charger or a conveniently placed Orbital Precision Strike, it can destroy the turret, and you’ll have to wait for a new one.
How to kill 100 enemies with a Gatling Sentry in Helldivers 2
To get 100 kills with the Gatling Sentry, you’ll have to use the Stratagem about six times, given you drop them in areas where they can kill enemies without getting immediately destroyed.
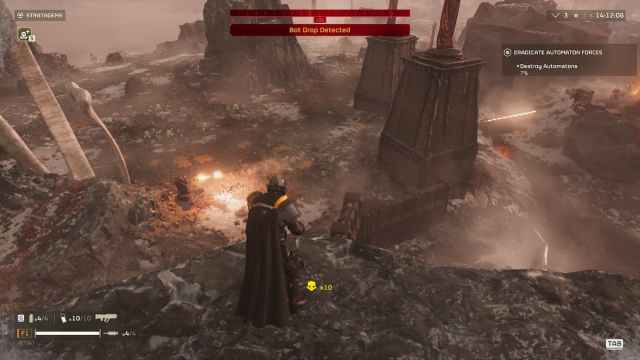
The type of mission you go for to complete the Order doesn’t matter that much. You can either go for shorter missions like the Eradicate Automaton Forces (you’ll need a few of them) or any full-sized mission. I recommend going for high-difficulty missions if possible, as in those, the Sentry will have more targets to shoot at.
Head for the objective or a large enemy outpost when on the mission. Allow the enemies to summon Bot Drops/Bug Breaches and then use the Gatling Sentry to administrate Freedom. Make sure to have backup Stratagems to deal with the enemies while the Sentry is on cooldown, and you should complete the Personal Order in no time.


Published: Apr 9, 2024 08:46 am