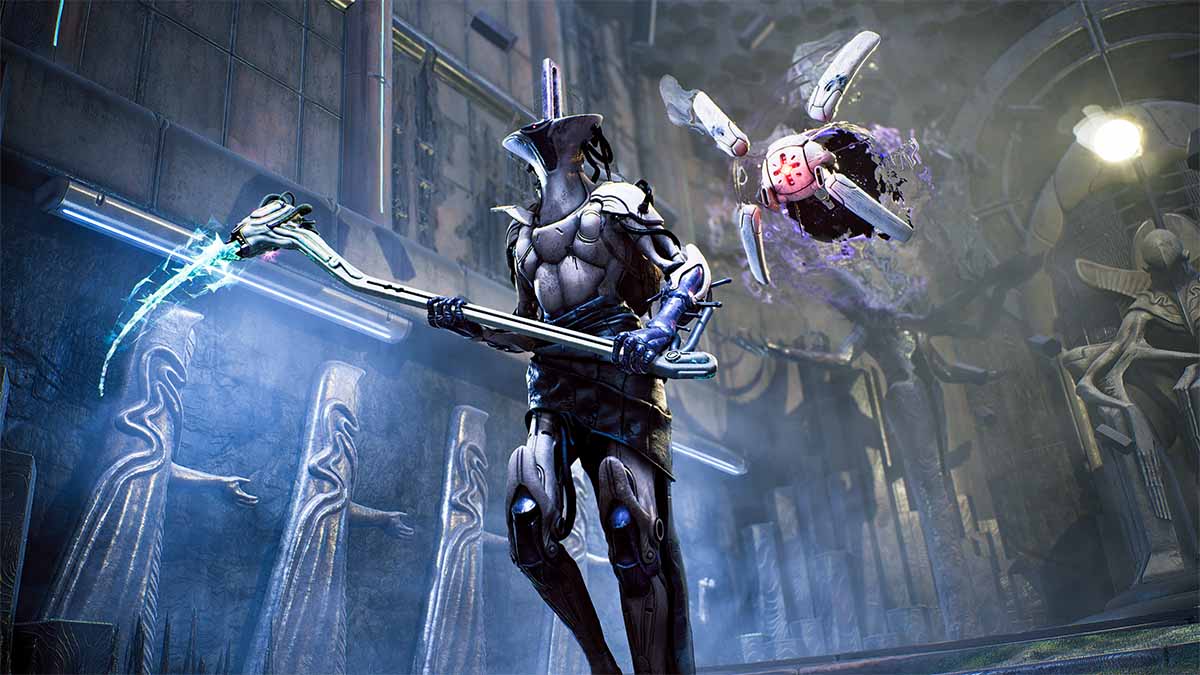
Bruin, Blade of the King is an optional boss in Remnant 2′s Awakened King DLC that can cause quite the headache for new and experienced players alike.
Remnant 2 has always been a challenging game, even on the lowest difficulty setting—and The Awakened King is no different. With that said, knowing exactly what you’re up against and how to prepare makes a world of difference.
Remnant 2: Bruin, Blade of the King boss guide
Bruin, Blade of the King is sort of one of those “fake hard” bosses. He throws out some intimidating attacks, and he definitely won’t hesitate to one shot you, but once you get the hang of his moves, he’s actually very repetitive and predictable. In fact, there are only a few things you really need to watch out for.
Bruin, Blade of the King’s attacks
Bruin has four main attacks: A stabby one, a slashy one, a jumpy one, and a throwing one. Learn the four, and you won’t have any problems. Of his attacks, the stabby one is by far the most dangerous and important to evade.
Lunge attack
The lunge attack, or “stabby one,” as we call it in the business, is absolutely decimating. During this attack, Bruin stops in place to charge for a few moments and then lunges forward to stab you after flashing white with an audio cue. This attack deals about 85 to 90 percent of your health on Survivor difficulty, and if you’re on any of the higher settings, you can forget about surviving entirely.
With that said, you really shouldn’t be getting hit by this. The “trick” is incredibly simple—wait until after he flashes white to dodge, and this attack won’t even hit you. Just don’t lose your cool and spam roll early. If you wait until Bruin has flashed, his lunge will always be met with i-frames.
Slashing attack
Bruin has different variations of his slashing attacks, but none are unique enough to warrant their own sections. During the fight, he constantly throws out various melee attacks—all of which are extremely projected. The trick to surviving the onslaughts is not getting greedy and trying to attack him before he is finished the attack.
Very often, Bruin strings together three or four slashes, and he is very difficult to stagger. However, he does tire himself out. Wait for his combos to be finished rather than trying to interrupt them, and you should have no problems with these attacks.
Spear barrage
Bruin uses this at set intervals. When you’ve injured him enough, he leaps to one end of the long battlefield and begins tossing spears like it’s his favorite pass-time. This bad behavior continues until you reach him, so you shouldn’t waste any time in doing so.
Bruin spawns adds at the beginning of this attack, but he actually tears through them with his spears. There is a TON of friendly fire in this fight. Personally, I always killed a few of the adds before Bruin could, but that was only out of paranoia. Bruin really will take care of them all. Once you reach Bruin by bee-lining while evading spears, keep an eye out for his leaping attack, which always comes next.
Leaping attack
Bruin most often uses his leaping attack as a segue-way out of his spear throwing barrages, but he will sometimes bust it out in the middle of the fight as well. This attack is simple, but devastating. Bruin leaps into the air and come smashing down on your location. The dodge window is pretty damn generous, so just make sure you don’t let him leave your line of sight when he jumps, and you’ll be fine.
Bruin, Blade of the King’s weak spots
Bruin has one massive weak spot that takes some work to expose—but once you reveal it, you are able to completely melt him. Bruin’s stomach is incredibly vulnerable to damage, but he has a piece of metal armor protecting it. Target this armor, and after a few magazines, it will fall off. Once the armor has fallen, every hit to Bruin’s torso will be a critical, and you can kill him very quickly.
Exploiting Bruin’s weak belly is the single most important part of winning this boss fight. Without this vulnerable spot, Bruin takes very little damage, and the chances that you make one simple mistake eventually become way too high.
The best strategy to defeat Bruin, Blade of the King
Now that you know all of Bruin’s tricks and weak points, let’s get into the actual strategy to defeat Bruin. The trick to this fight is keeping him as close to the center of the battlefield as possible. This fight takes place on a very long and skinny battlefield, and Bruin uses that to his advantage.
When you get him low enough to proc his spear barrage, he has two possible points he will do it from—the two ends of the battlefield. No matter what, Bruin will choose the one farthest from you, meaning you potentially have to run across the entire battlefield while dodging his spears. If you camp out around the middle of the battlefield, Bruin never has a great option for spear barrage exploitation. Staying in the center of the map will also keep you from running into line of sight issues or getting stuck in any corners.
Finally, here are a couple more tricks you can use to ensure your victory against Bruin:
- Throw everything you have at his belly armor immediately. The sooner you expose his weak-spot, the better.
- Every few bars, Bruin needs to kneel over and rest. This makes it look at first like you can’t shoot his stomach, but you can—you just need to be standing directly in front of him.
- Make sure you grab the ammo dropped by Bruin’s slain adds while making your mad dash to cover from his spears.
- There are several statues that act as “cover” from Bruin’s spears, but they are easily destroyed. Don’t really on them unless you absolutely have to. If you need to pop behind one to heal, make sure you waste no time to get moving again.



Published: Nov 14, 2023 12:24 pm